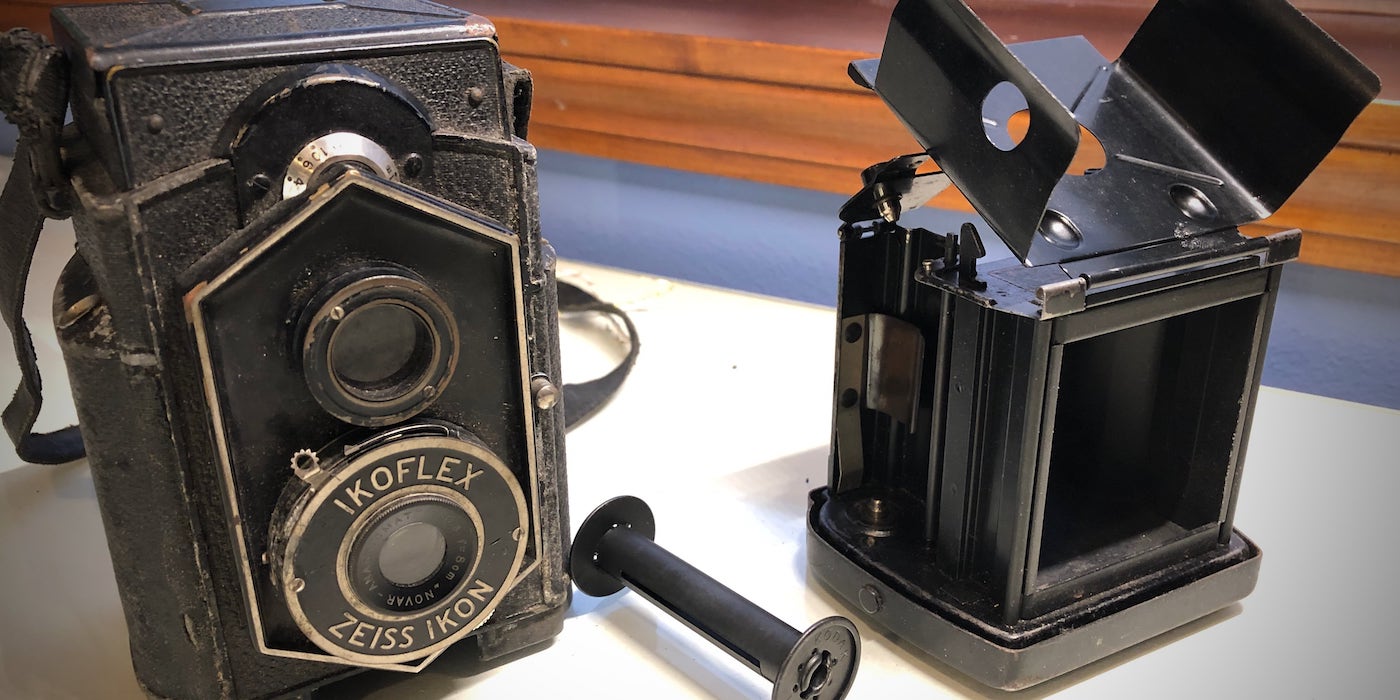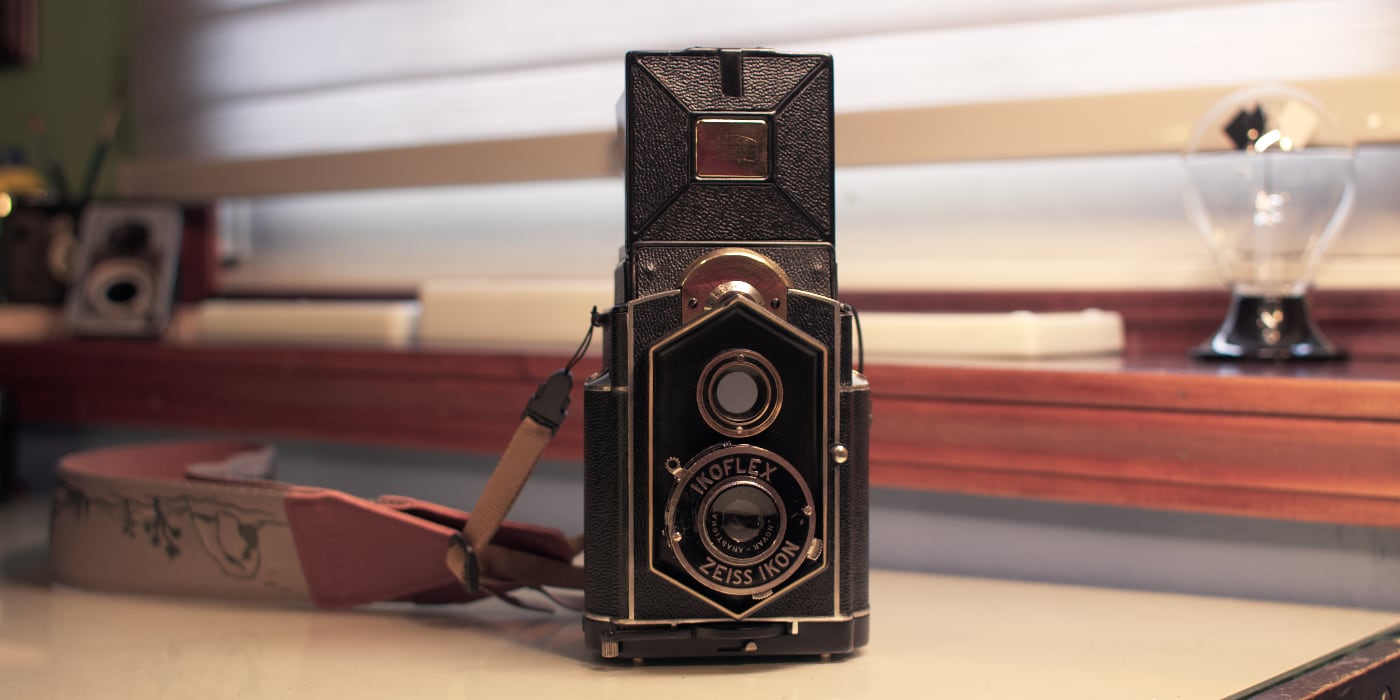
I found this amazing old Ikoflex at an antique shop. The art deco styling of the coffee can model is beautiful, which is probably why it was being sold as a decorative piece. I was surprised to find the focusing mechanism and all of the shutter functions working properly. They were all stiff, but they appeared to work. The camera was priced like a decoration and not like a vintage camera, so I nabbed it for my collection.
When I got the camera home I did a more intensive test which includes loading a test roll of medium format film. That is when I discovered that the film advance didn’t quite work. The film advance uses a simple clutch which catches when film is wound and slides when the wind lever is pushed back to its original position. The extra friction of having film loaded caused the clutch to slip. And though the focus mechanism worked, it was rather stiff. Attempting to use a stiff focus mechanism can cause other parts to wear very quickly due to the additional force needed to adjust the focus. Due to those two factors, I decided I needed to restore the camera before using it.
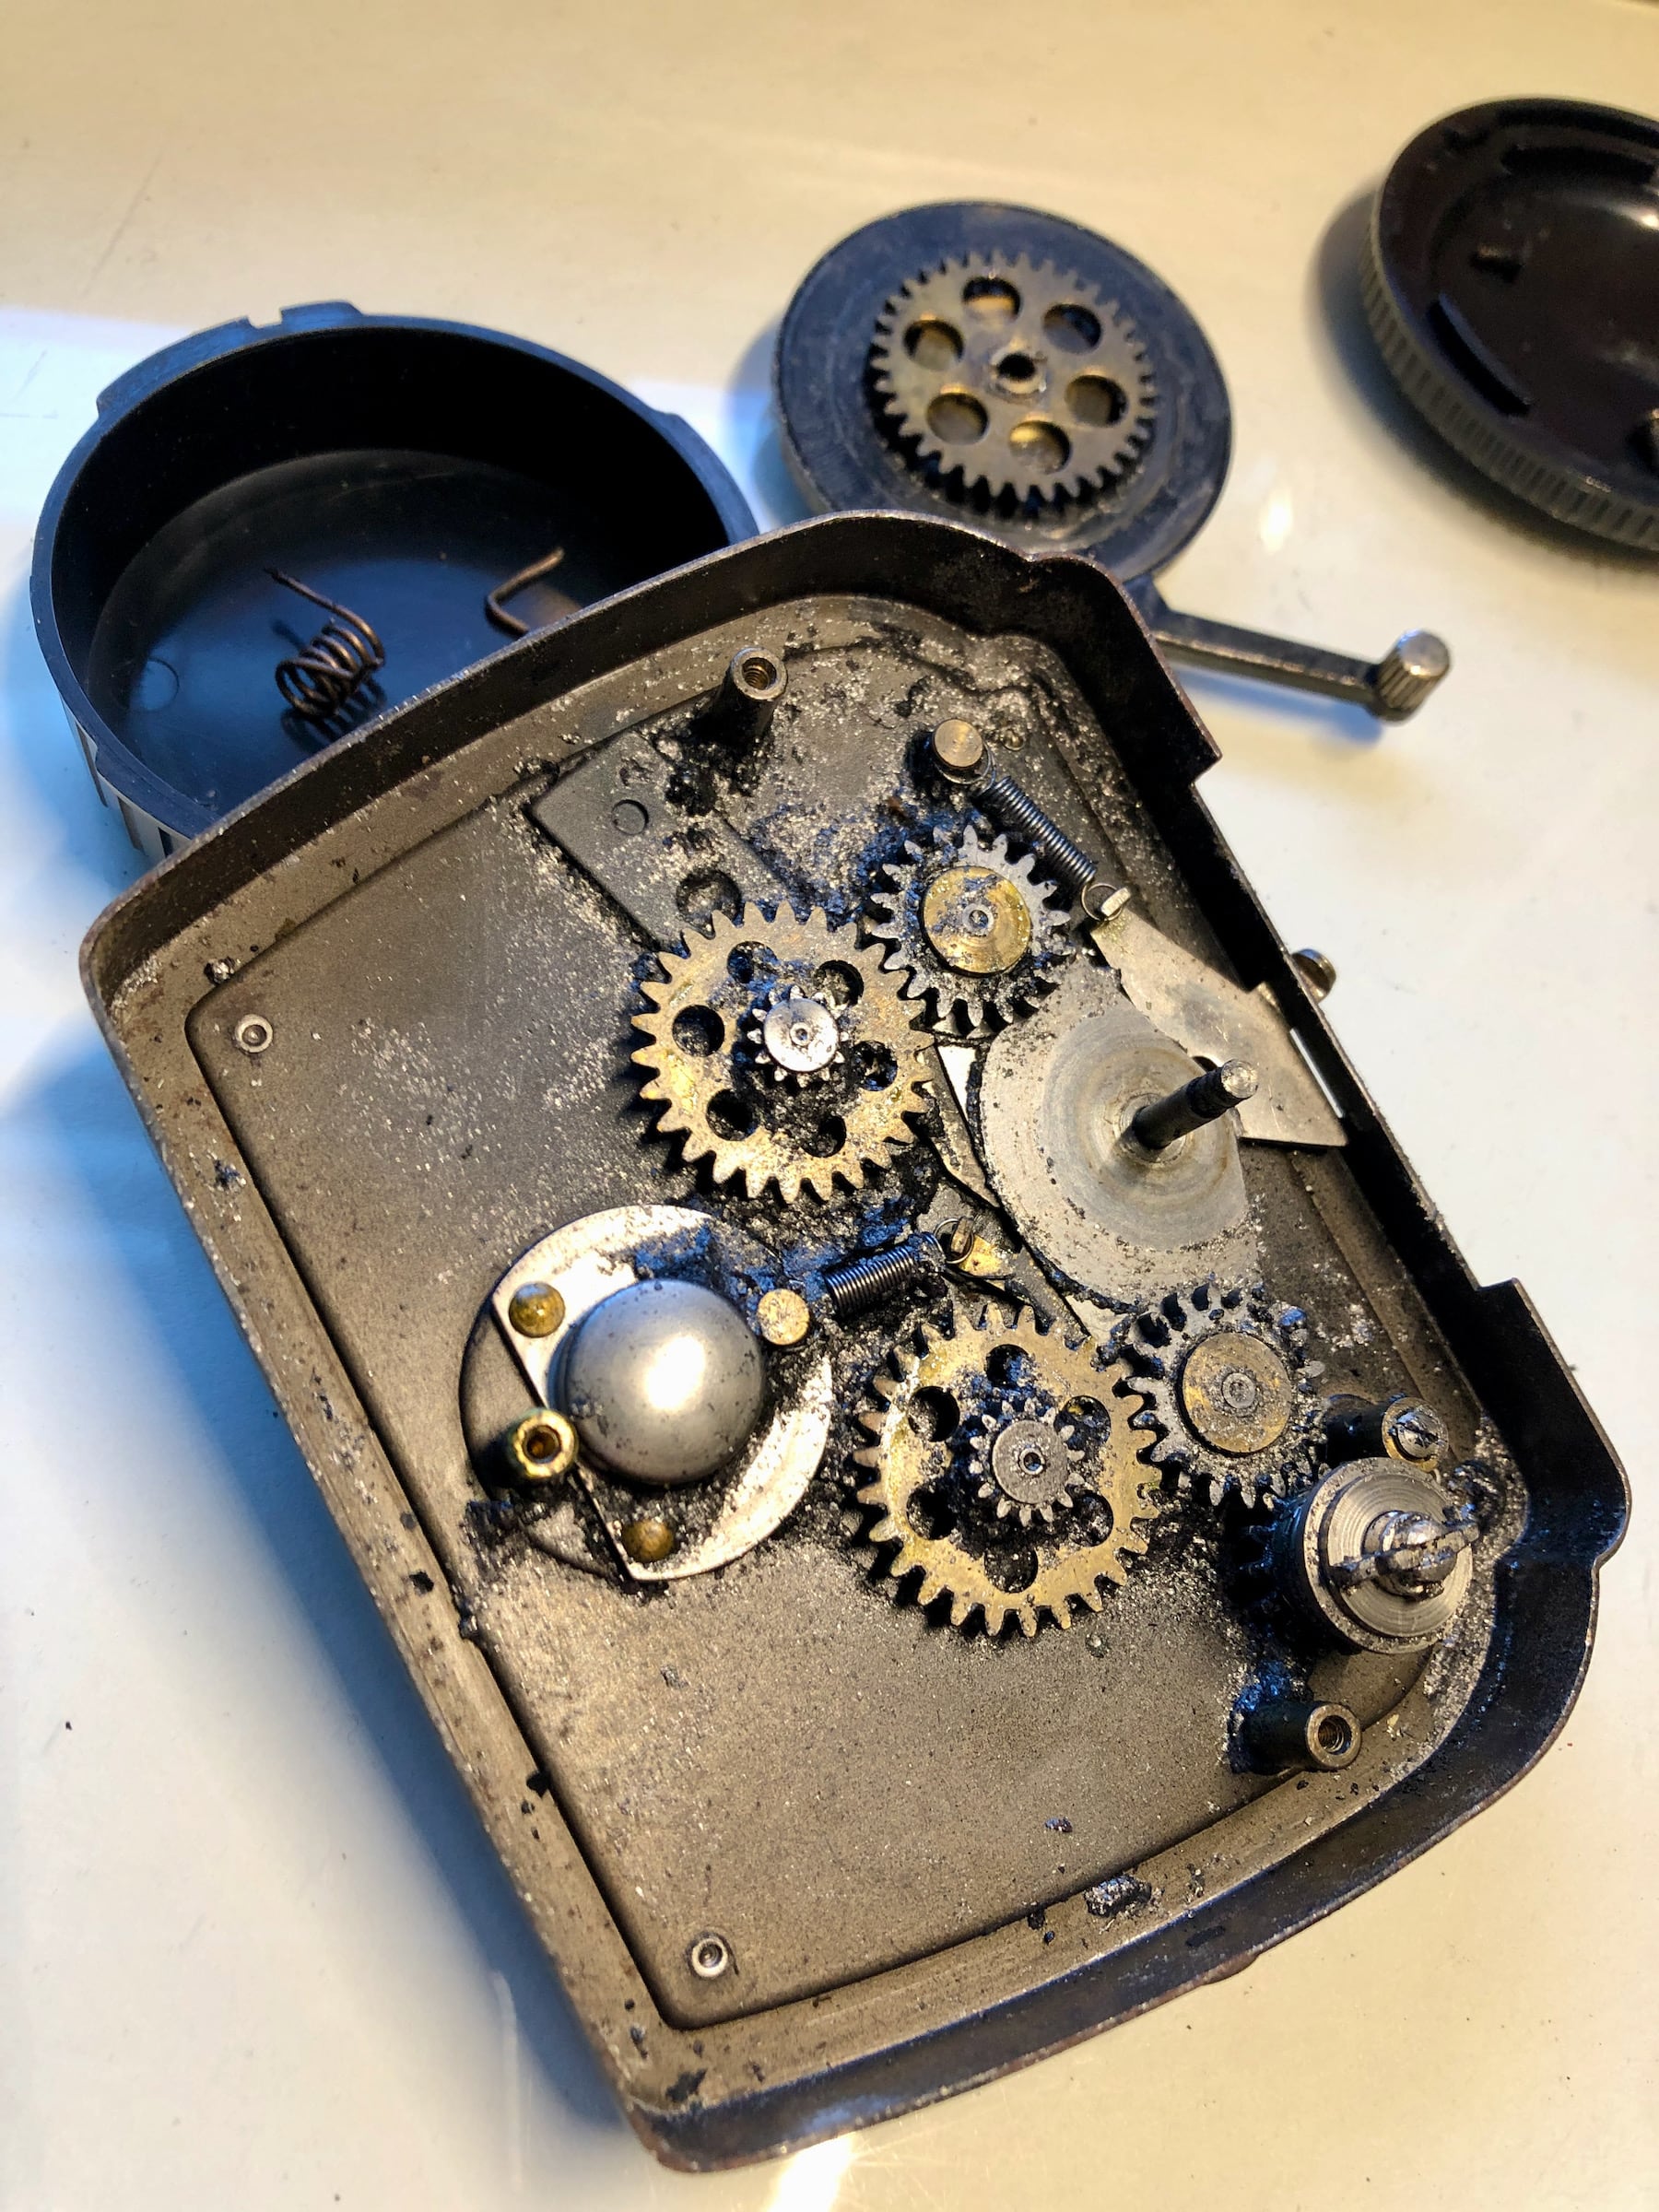
I started the restoration by disassembling the film advance mechanism. The film advance is part of the film carrier which slides out of the bottom of the camera. I assumed this would be easy to fix since it easily detaches from the camera body. When I opened the bottom of the film carrier I saw that all of the gears were covered in old tacky grease. The grease was either covered with what looked like graphite or had that substance mixed in with it. I chipped off all of the dried grease and stripped the components down to raw metal again. After everything was clean I applied fresh grease. Though this made the mechanism work, it still did not work reliably. It would intermittently catch and then slip. The roller bearings in the clutch were worn, so I had to create replacement ones from brass rod stock.
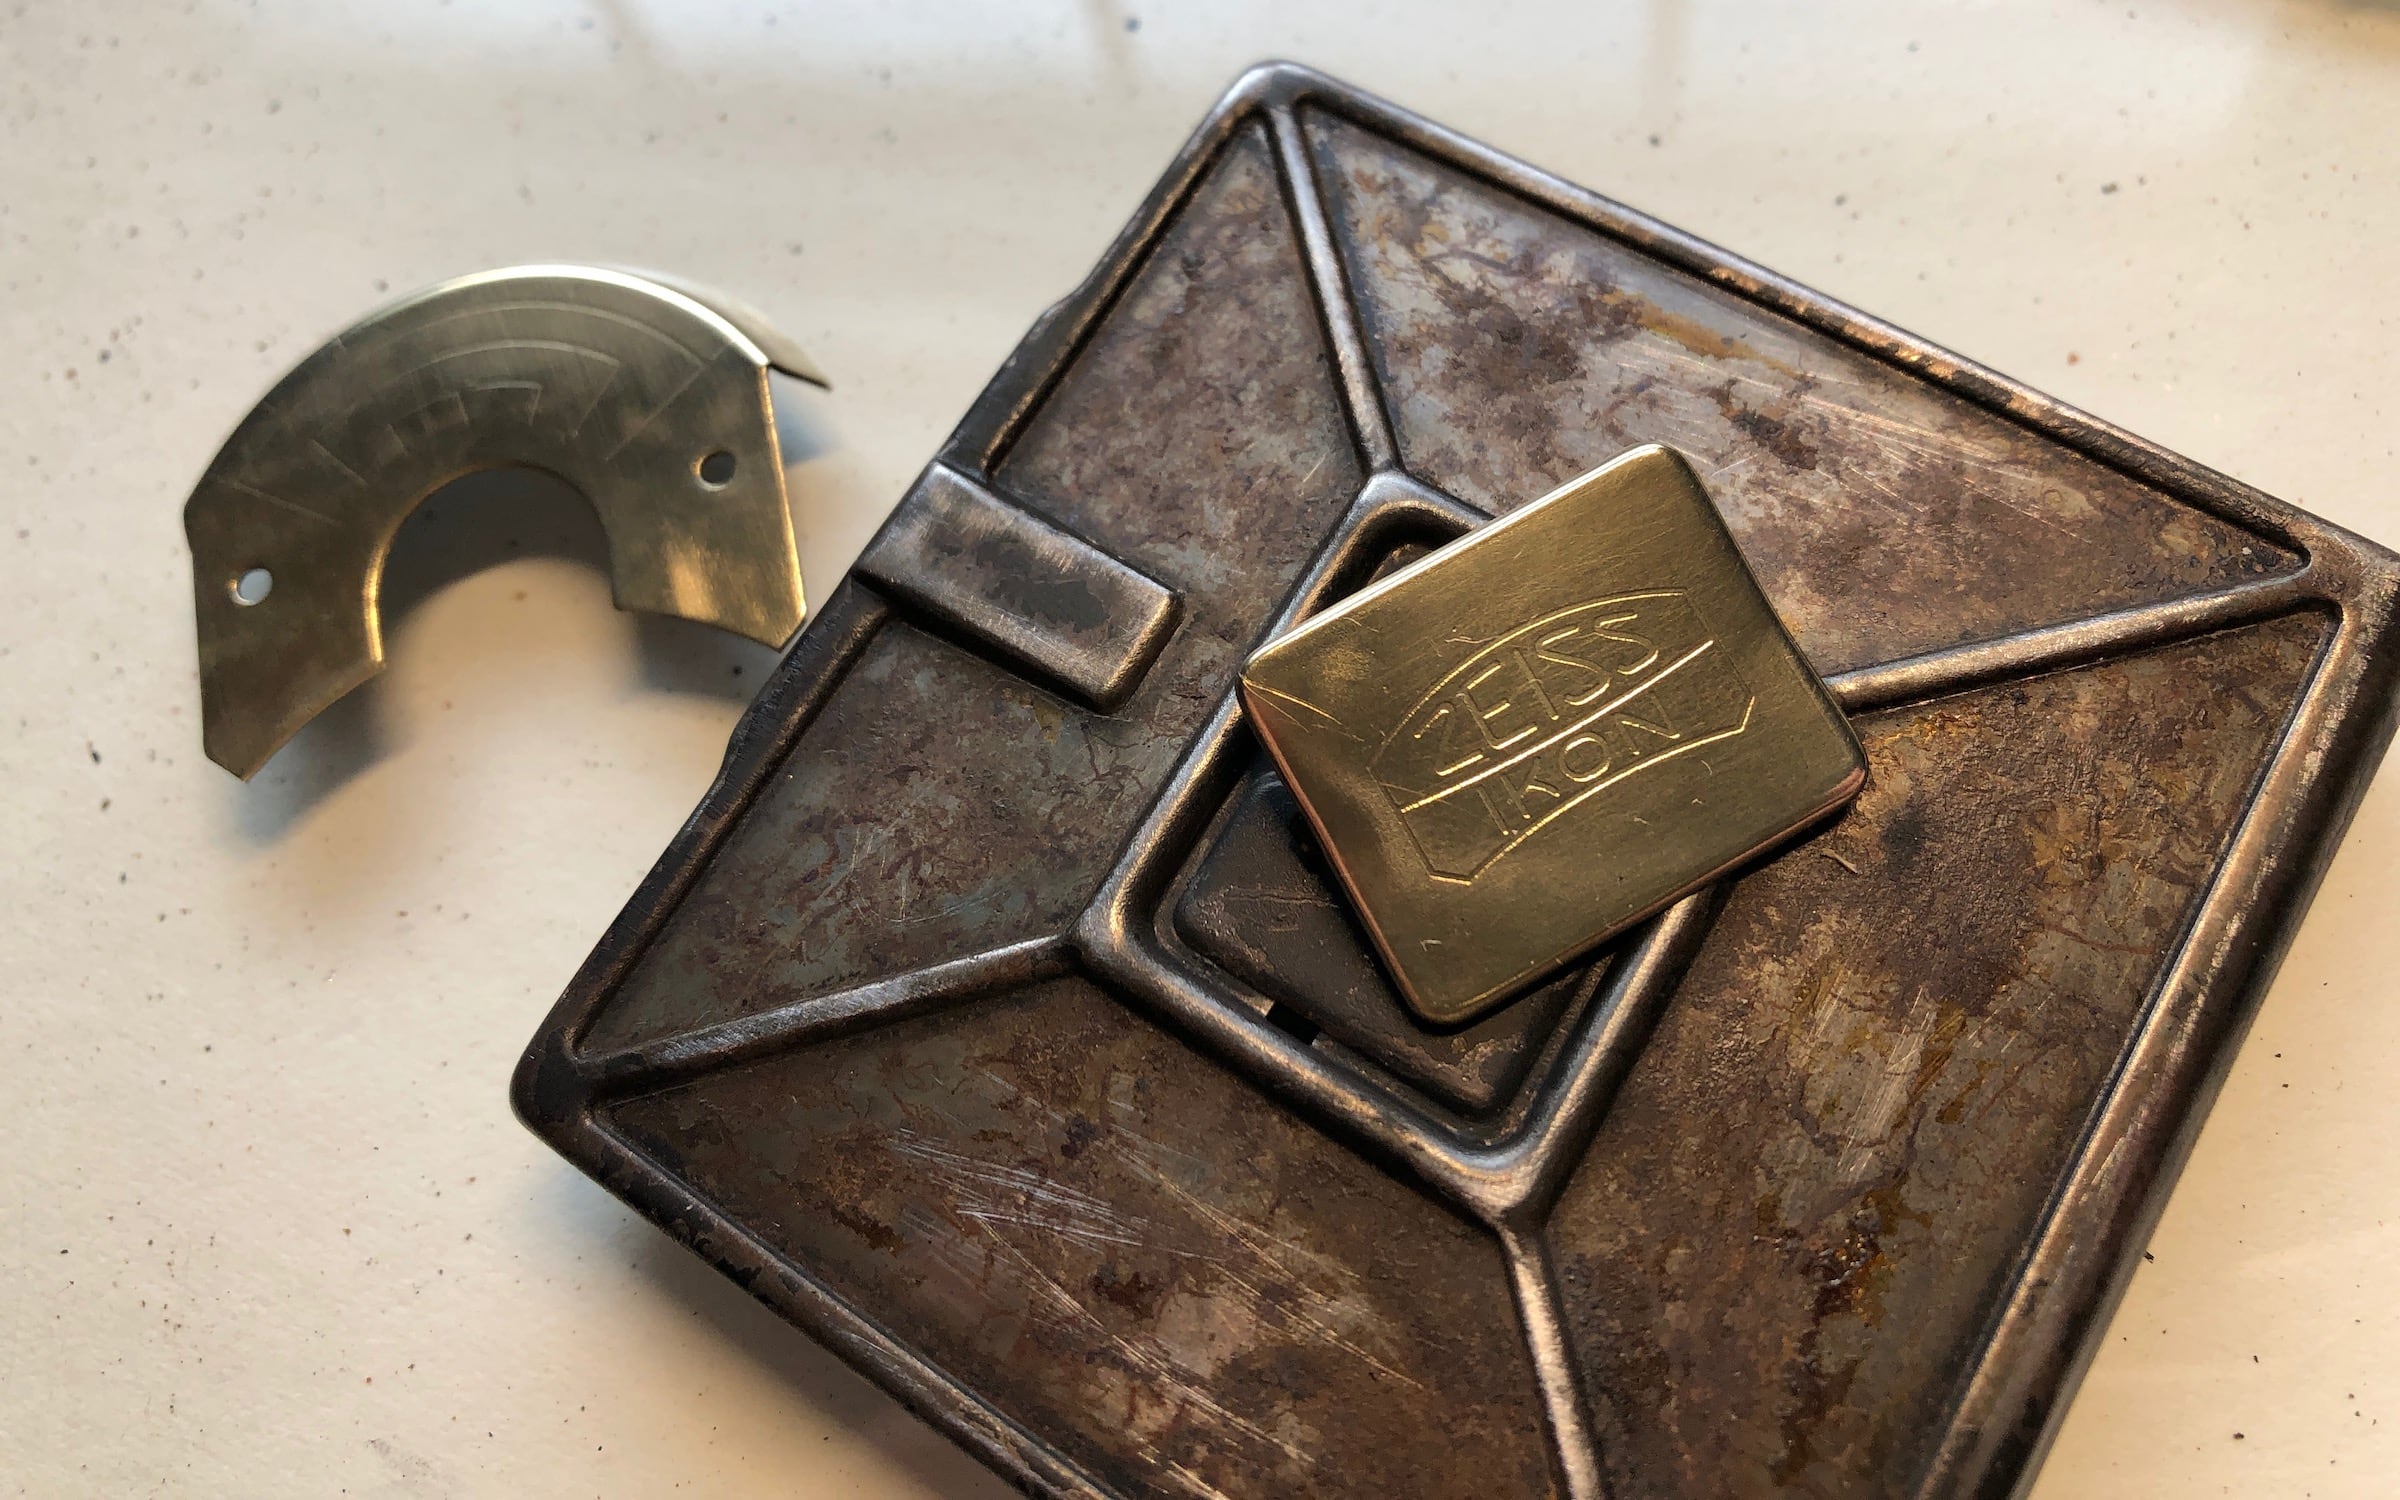
With the film advance repaired I turned my attention toward disassembling the camera body. I didn’t intend to strip the camera to bare metal, but when I attempted to peel back the leather to access some of the screws the imitation leather disintegrated. At that point it just made sense to strip it down to the bare metal. Originally, the parts of the chassis which were not covered by leather were painted black, even some nice brass pieces.
The brass pieces appear to have been painted black and then printed with the Zeiss logo or the focus scale. I had no straightforward way of recreating the printed information. So, it was fortunate that the information was also stamped into the brass. I’m not sure why they went to the effort of stamping the brass parts, only to cover them with paint. Perhaps the raw brass was difficult to read. Or, perhaps the camera was originally designed for the ostentatious economic boom period, and when the bust came the look needed to be more subdued. I decided to polish the exposed metal, at least the parts which could be polished.
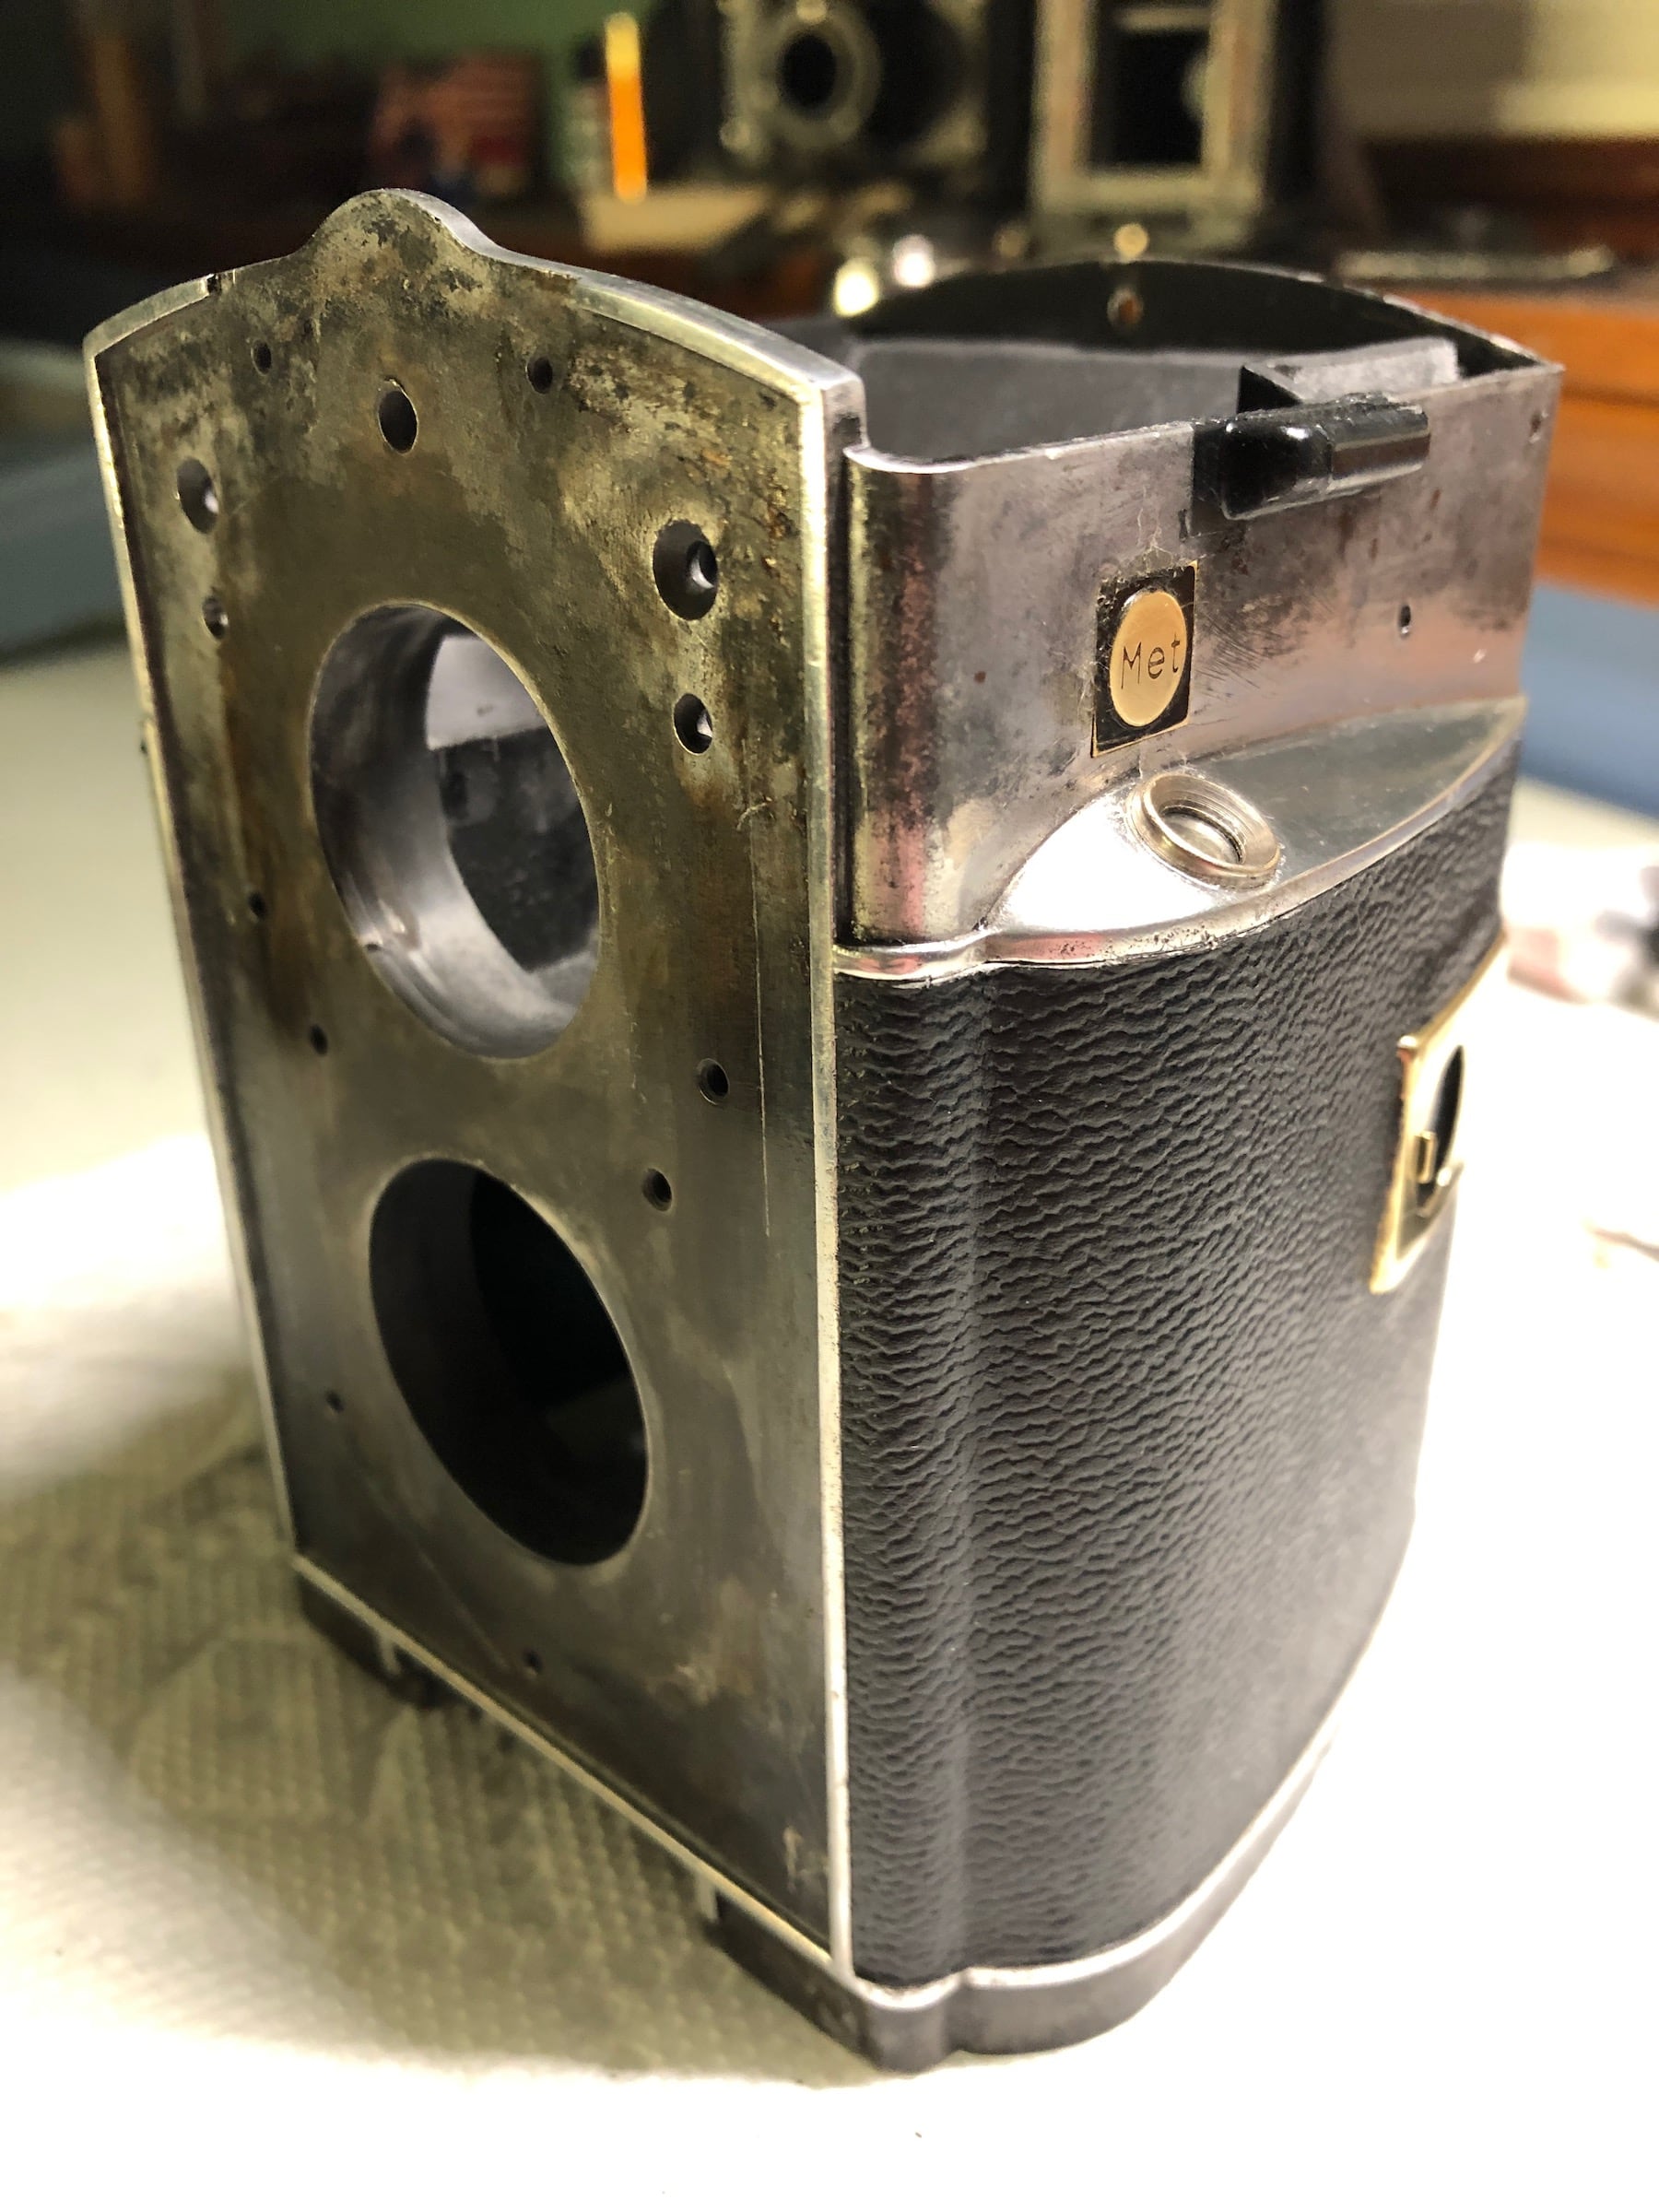
The exposed and polished metal on the camera was brass and aluminum, both of which will tarnish if left exposed. So, I put a light clear coat these parts. The clear coat was a modern polymer designed to protect metals, not a vanish that will yellow over time. Next, new leather was cut and applied. I saved the original leather pieces to use as a template. I cut the pieces large and then trimmed them to fit precisely. Thanks to this camera’s sexy curves, attaching the leather was more challenging than expected, but I made it work.
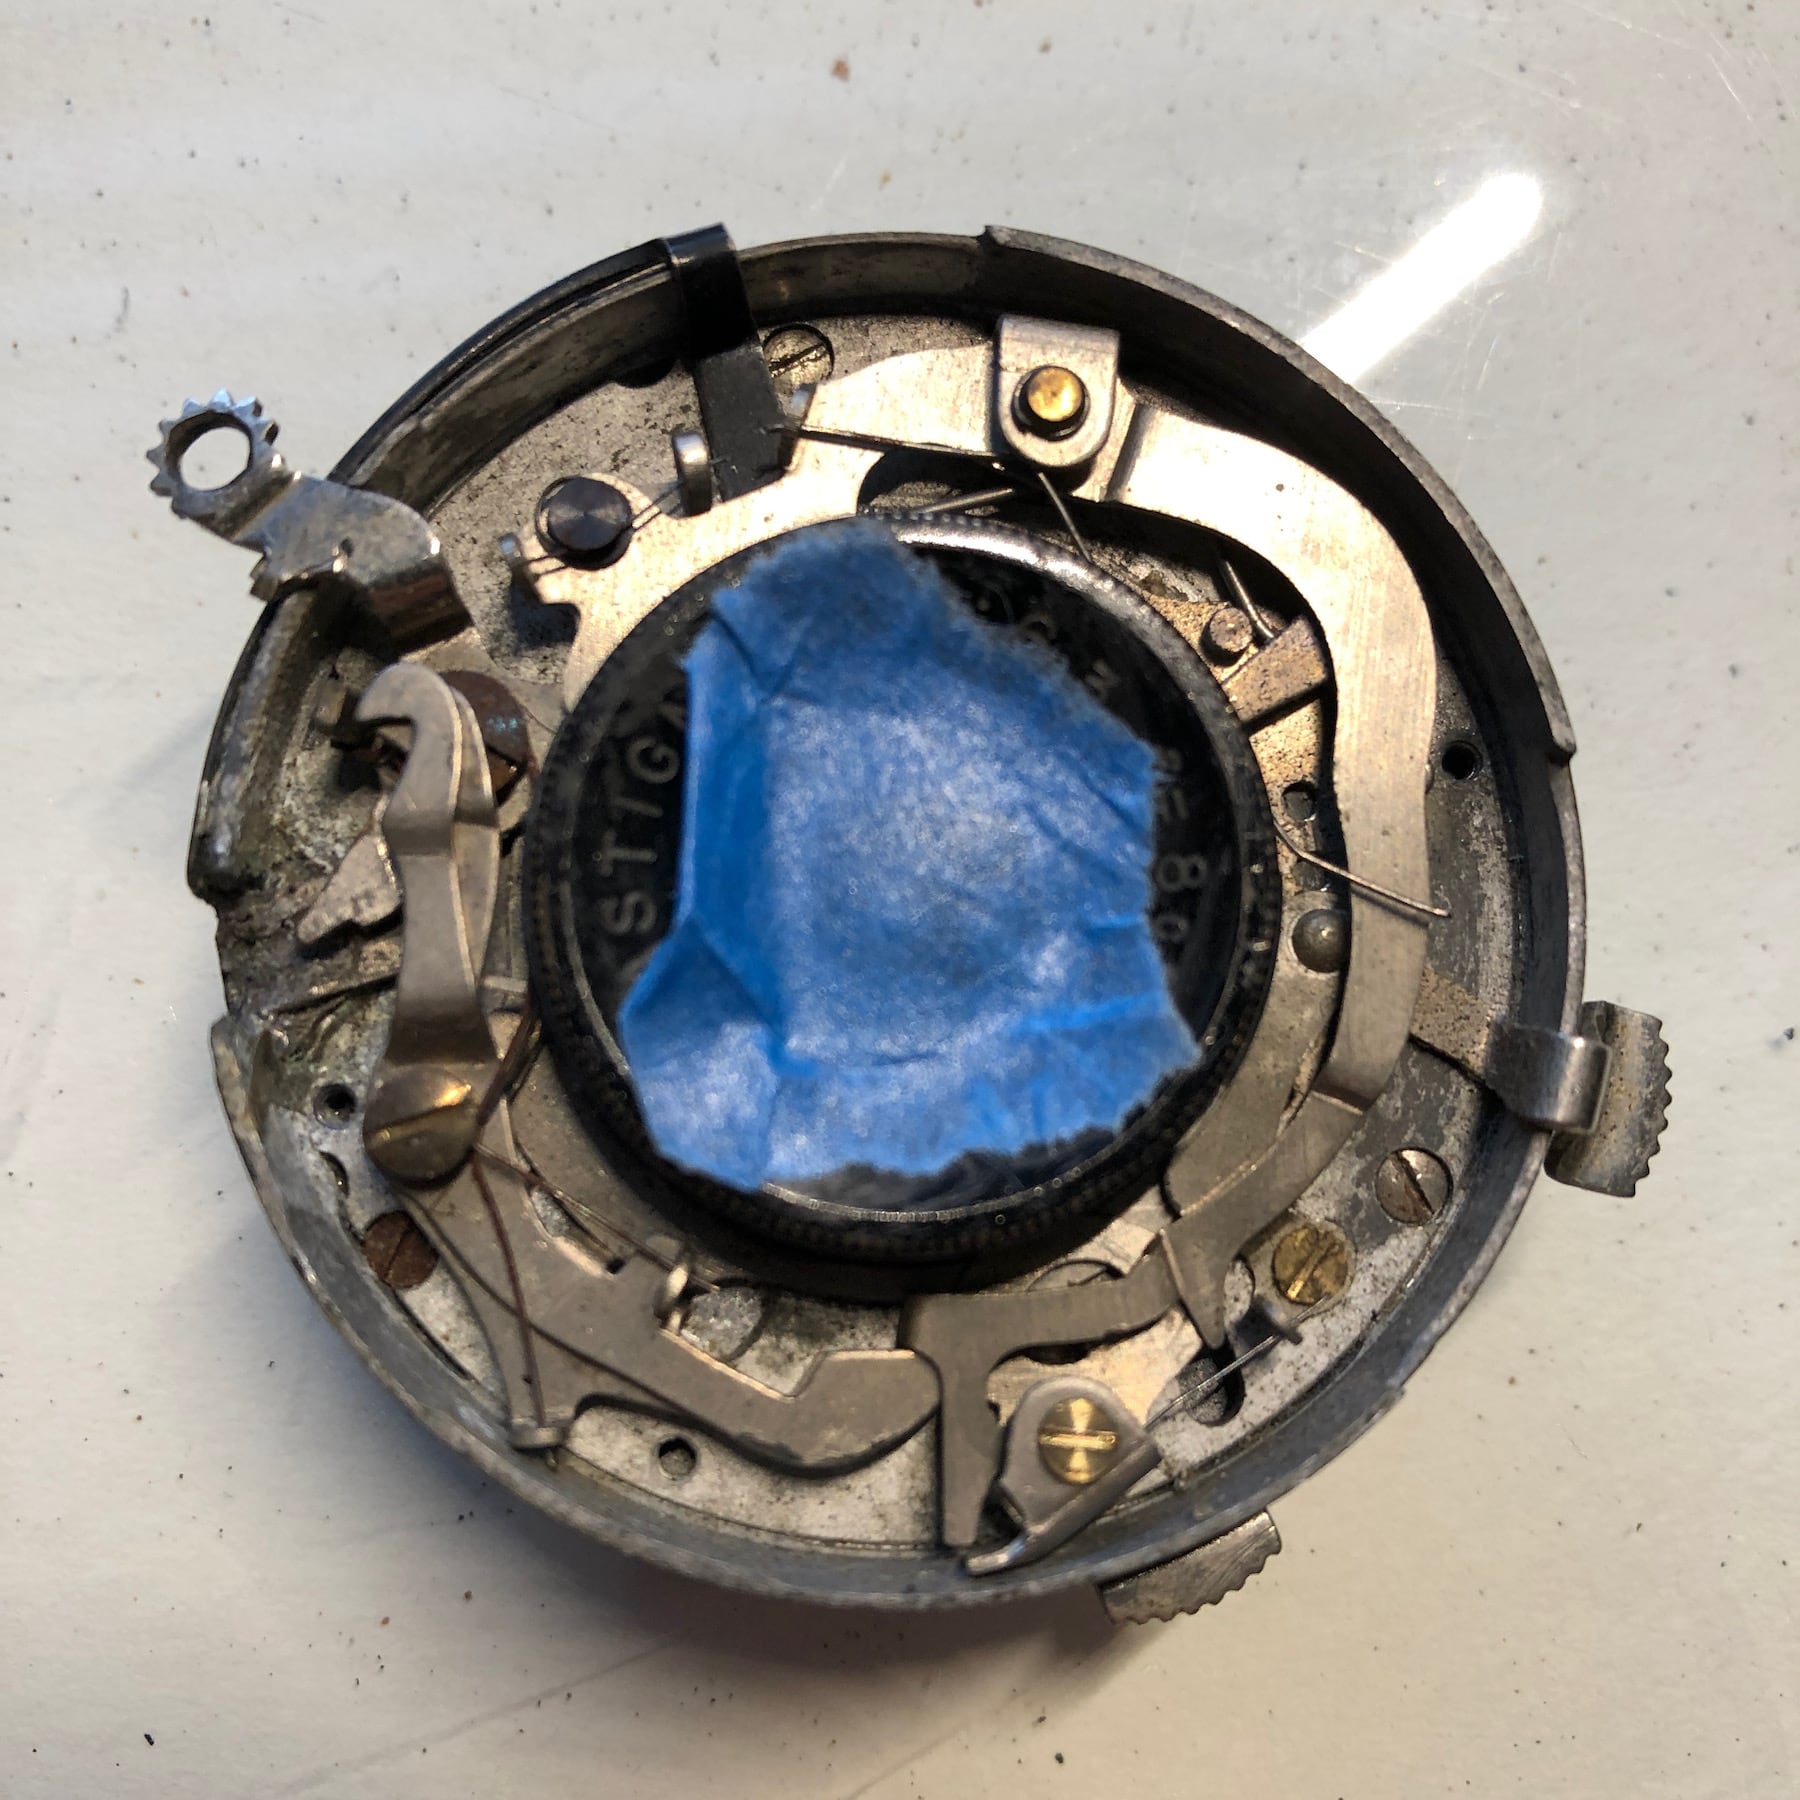
I thought that restoring the exterior would be the most challenging part of the restoration, but performing the CLA on the shutter is what actually took the most time. The shutter mechanism itself is very simple. The problem is that at some point in this camera’s life the cable release thread broke off and someone attempted to braze the piece back in place. The patch did not achieve its intended purpose, the cable release thread hole was missing when I got the camera. However, the shutter mechanism plate was effectively brazed to the shutter mechanism housing. So, I had to manually cut the parts apart using an Exacto knife.
After a lot of careful work the shutter mechanism plate detached from the housing. At one point I tried to use heat and flux to desolder the joint, but that did not work. Flux from that attempt, visible in the photographs, needed to be cleaned from aperture blades. The shutter plate and housing also needed to be sanded smooth again.
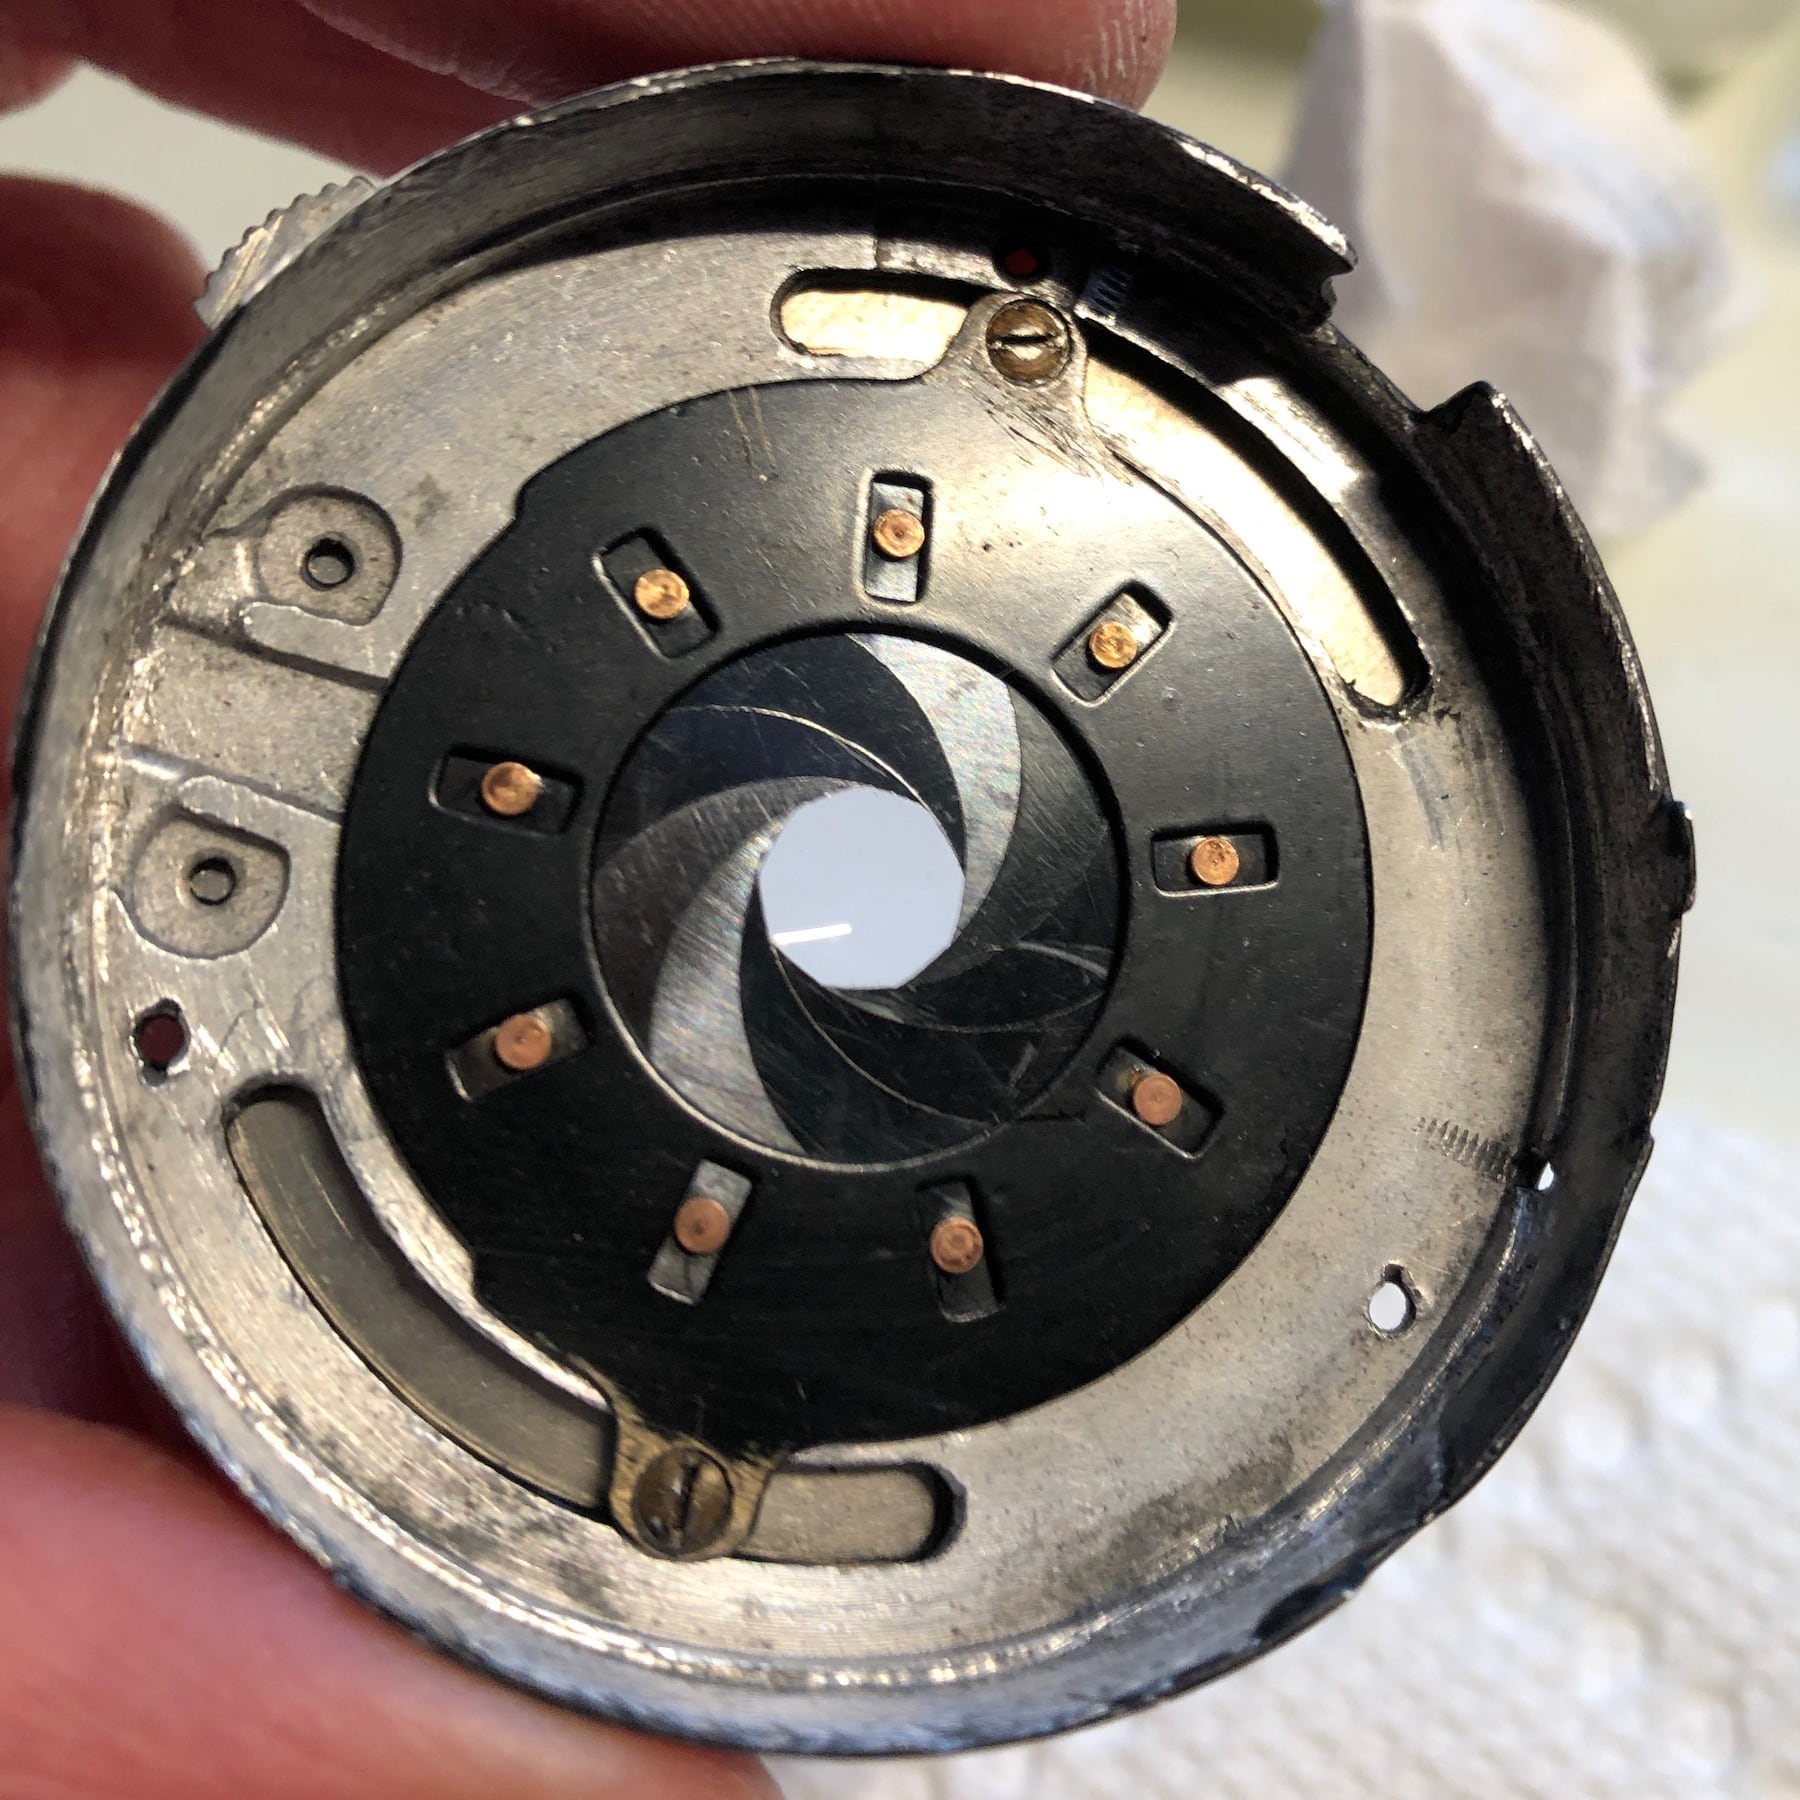
I’m always amazed when I am able to reassemble diaphragm blades. It normally takes two or three tries to get it right, but once it’s done it is very satisfying to witness the smooth action of freshly cleaned aperture blades. The twin shutter blades were also cleaned and remounted to the bottom of the mechanism plate. The drive train on the front of the mechanism plate control the action of the shutter blades, so they all must be assembled together. The aperture works completely independently of the shutter.
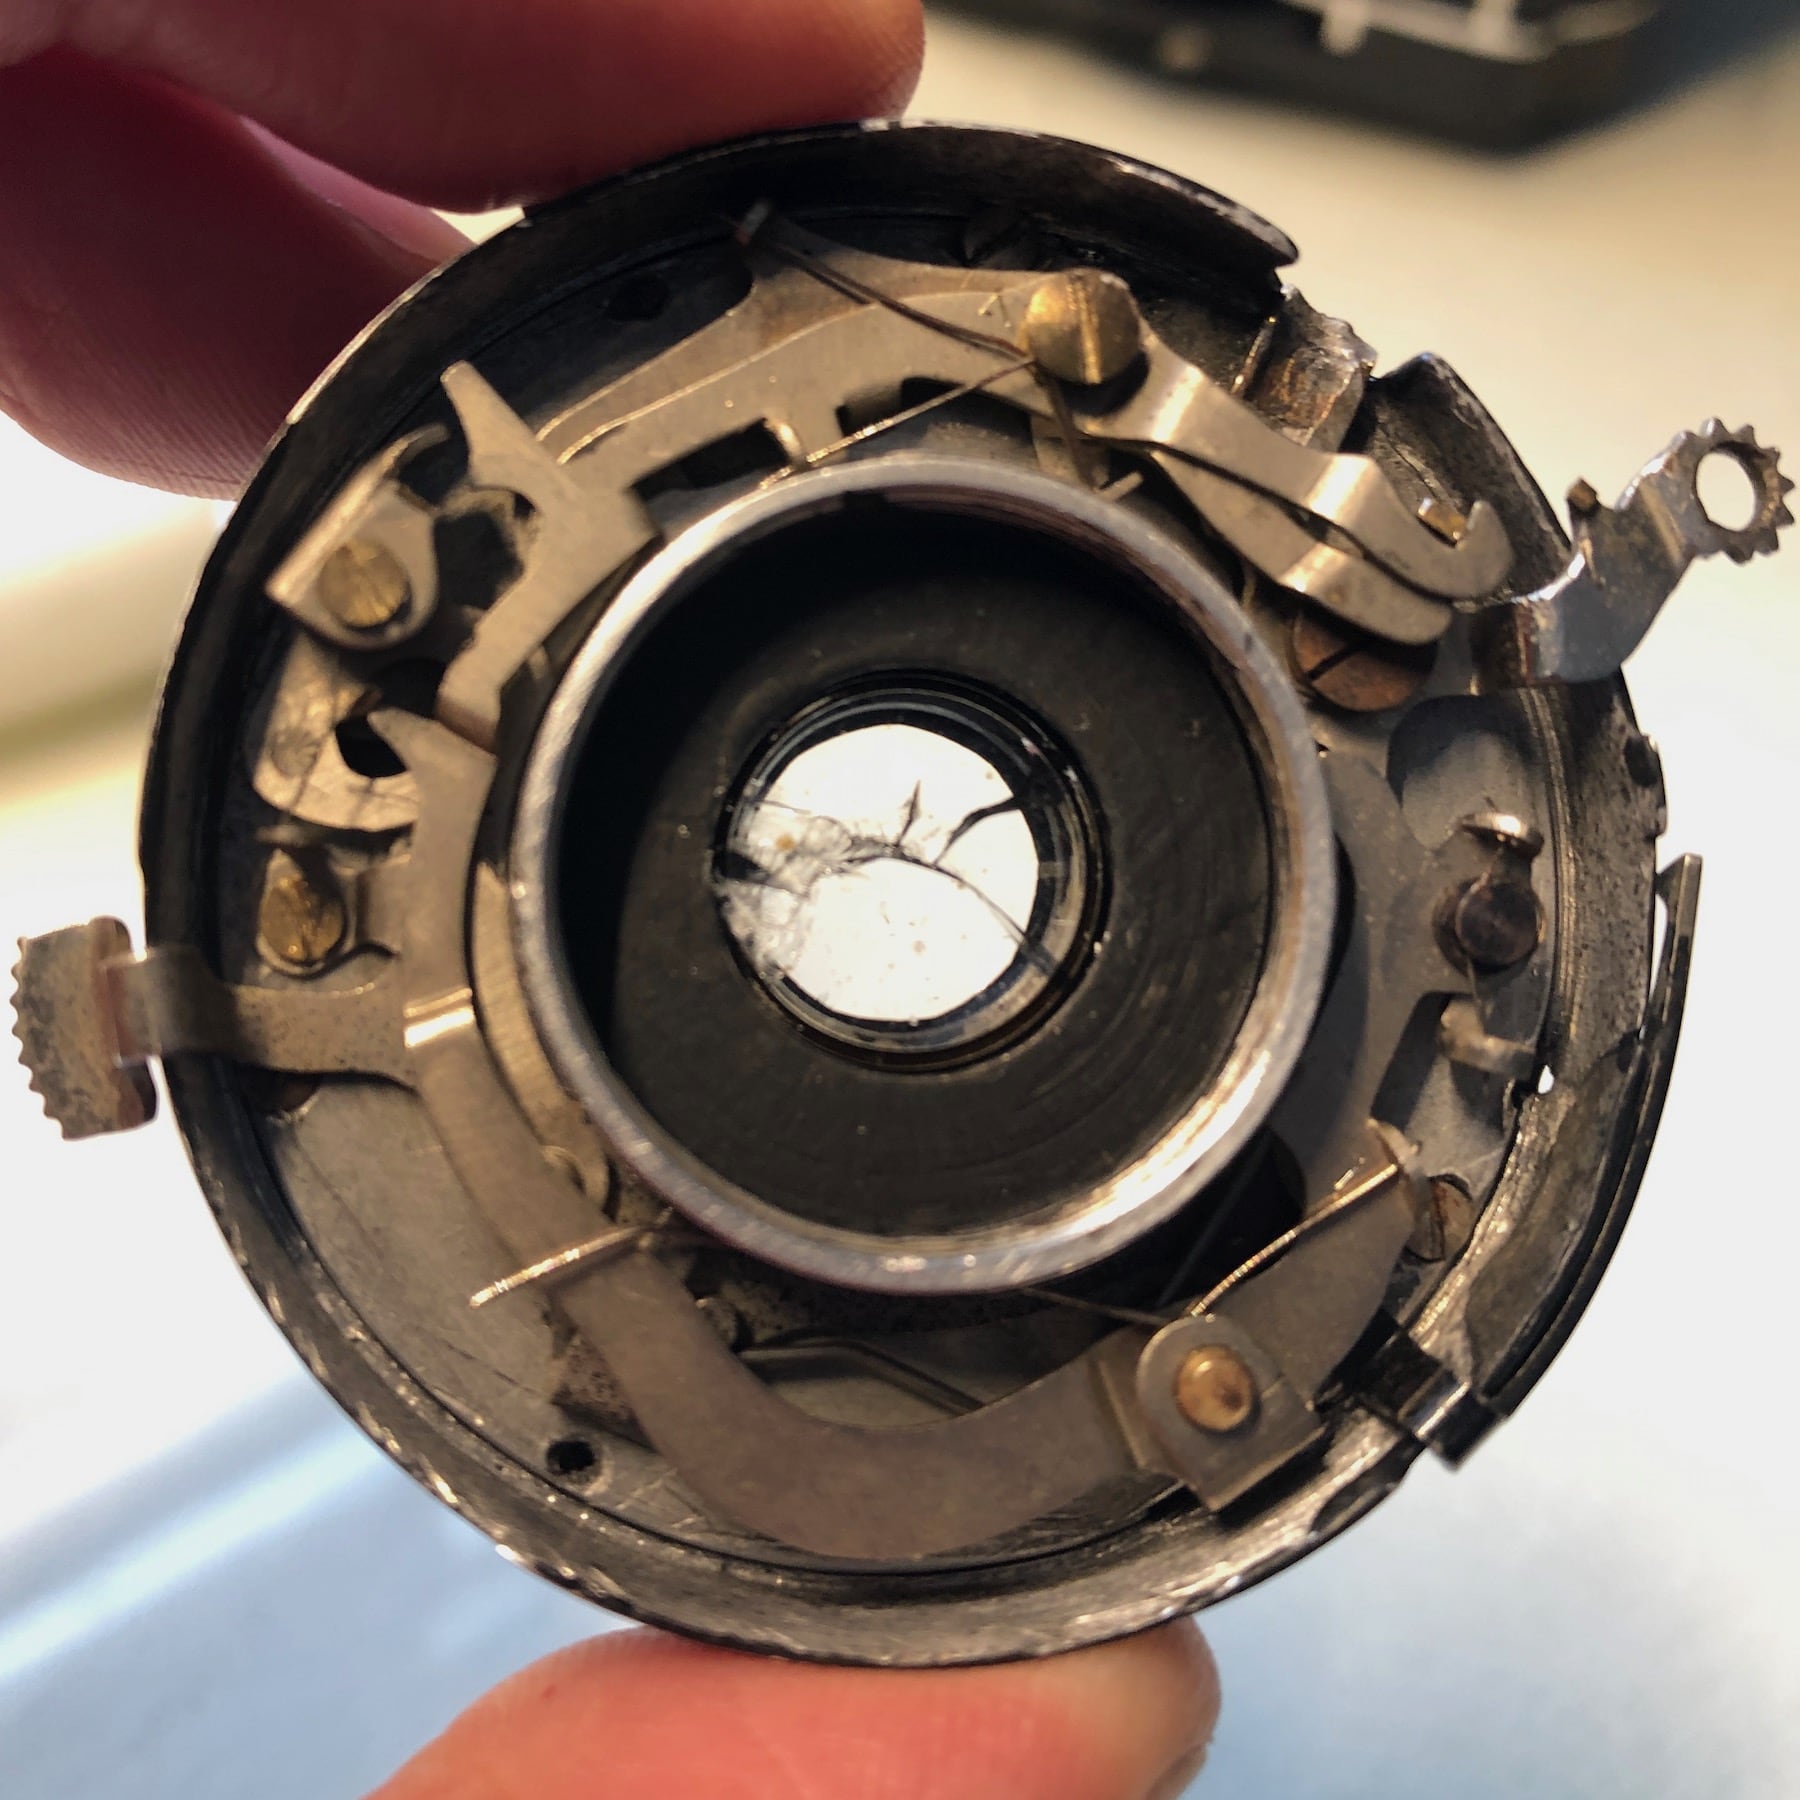
With the aperture and shutter mechanism reassembled the only thing left was to reinstall the lens elements. This is when I made a critical mistake. I dropped the front lens element into the shutter assembly, then I went to apply the snap spring which holds it in place. Unfortunately, the lens element was not properly seated, so when the snap spring was pushed into place the lens cracked. That made me very sad, since finding replacement parts is almost impossible.
I decided to finish the restoration and assembly, despite the broken lens element. I even took the camera out and shot a roll of film. Despite taking the camera out on an overcast but bright day with bright reflective snow, the images came out very dark. I assume that since the lens is broken it is not transmitting as much light as it normally would. The negatives are also blurry in the lower right, which corresponds with the broken portion of the inner lens element.
The camera looks great, perhaps better than when it was new. But, the images it produces are not really usable. So, until I can either find a replacement lens element or learn to grind lenses, this camera will go back to being a decorative piece. It is a beautiful decorative piece, but it would be worth more to me if I could actually make photographs with it.
Ikoflex
Six by six
“A lens above a lens below”An interesting, new design from Zeiss Ikon: easy … and economical!
Available at Good Dealers.
Illustrated brochure available free of charge upon request from your dealer or a representative of Zeiss Ikon A. G. Dresden