I’m a fan of the Bauhaus, especially how they strove to eliminate the divide between artists and artisans. I feel that the best products are those that live up to principles of the Bauhaus movement, and that extends to how I view cameras. One of the best examples of this are cameras in the Agfa Optima Sensor line, such as the Optima 1535. I also like cameras which have blurred the line between art and engineering without strictly adhering to other Bauhaus principles. The original Ikoflex “coffee can” TLR, with its ergonomics, quality optics, and Deco styling, is one such example. Another example is this camera, the Zenza Bronica C.
Some may say that the early Zenza Bronicas, save the original Bronica D, are just gaudy knock-offs of the contemporary Hasselblads. It is true that the camera’s patron, Zenzaburo Yoshino, was inspired by Victor Hasselblad’s excellent cameras. The original Bronica, the Bronica D, was essentially an improved copy of those Hasselblads. With the Bronica S and C, however, these cameras began to stand on their own and exhibit functional beauty.
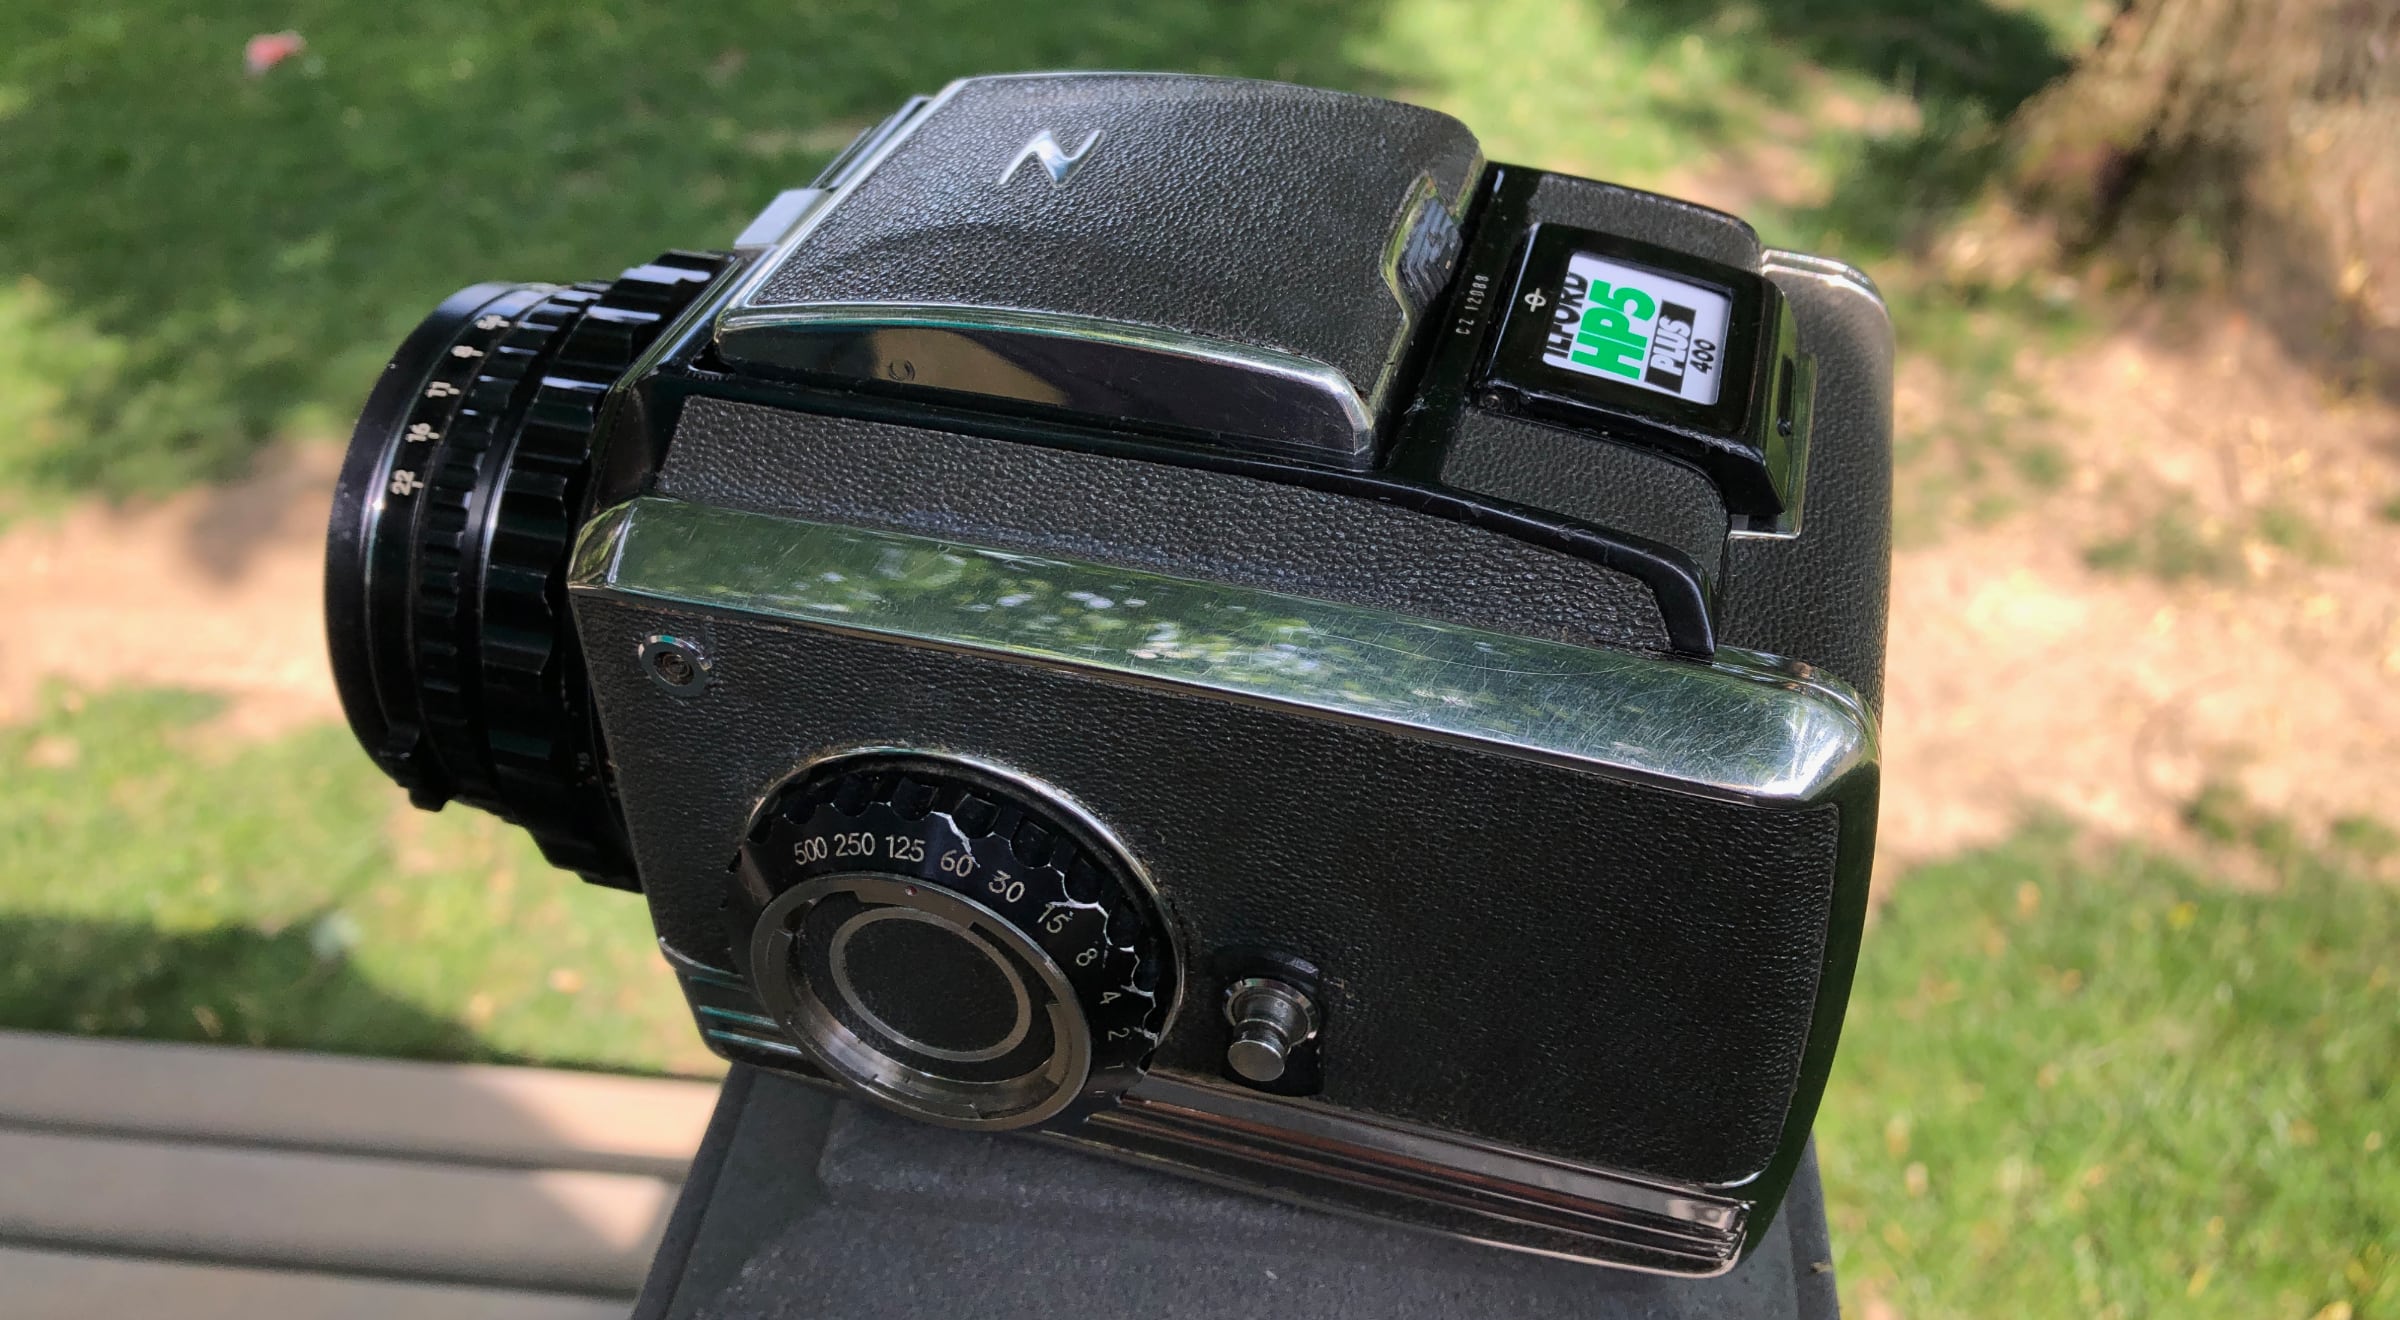
On first glance, the Bronica C does look like the flashy chromed American cars which were common in the 1960s. But, after using one of these cameras, I would argue that form is actually following function, perhaps more-so than on the venerated Hasselblads and latter Bronicas. The chrome stripes that run down the side fall where the photographer’s hands rest, so the high wear areas of the camera are much more resistant to showing signs of heavy usage. And rather than being a simple, shiny, flat surface, the lower chrome stripes are sculpted to provide grip. Furthermore, the stripes are not actually chrome, they are stainless steel. In fact the shells of these cameras are made from stainless steel, an expensive material which suits the purpose of something which is to be handled a lot.
Having said all that, to really have functional beauty, a thing must function. And while this machine probably functioned spectacularly when new, age is not kind to the metal springs which drive old mechanical cameras. I was anxious to shoot this camera, especially after what it took to make it function again, but I was a little disappointed when I developed the photos. Besides for a phantom light leak which is very repairable, the negatives showed problems with exposure. Since I was testing the camera I was sure to use a handheld meter for each shot rather than estimating via sunny-16. In my haste to demo the camera I skipped testing the shutter speeds, and they are very inconsistent. So, at an advanced age the camera still looks beautiful, but currently the results are less than stunning. Perhaps, with some more adjustments, I will be able to bring functional beauty back to this camera.
This particular camera was very cheap, and the seller was clear that the camera was not in working order. I assumed that as long as all of the original pieces were still there, I could easily get the camera working again. But, the Bronica C is a mechanical camera with a lot of complications, and I underestimated what it would take to get it working again. I disassembled and assembled the camera dozens of times before I got it operating reliably. Even if you are experienced at repairing old cameras, I would not suggest attempting to repair one of these unless you have a lot of patience.
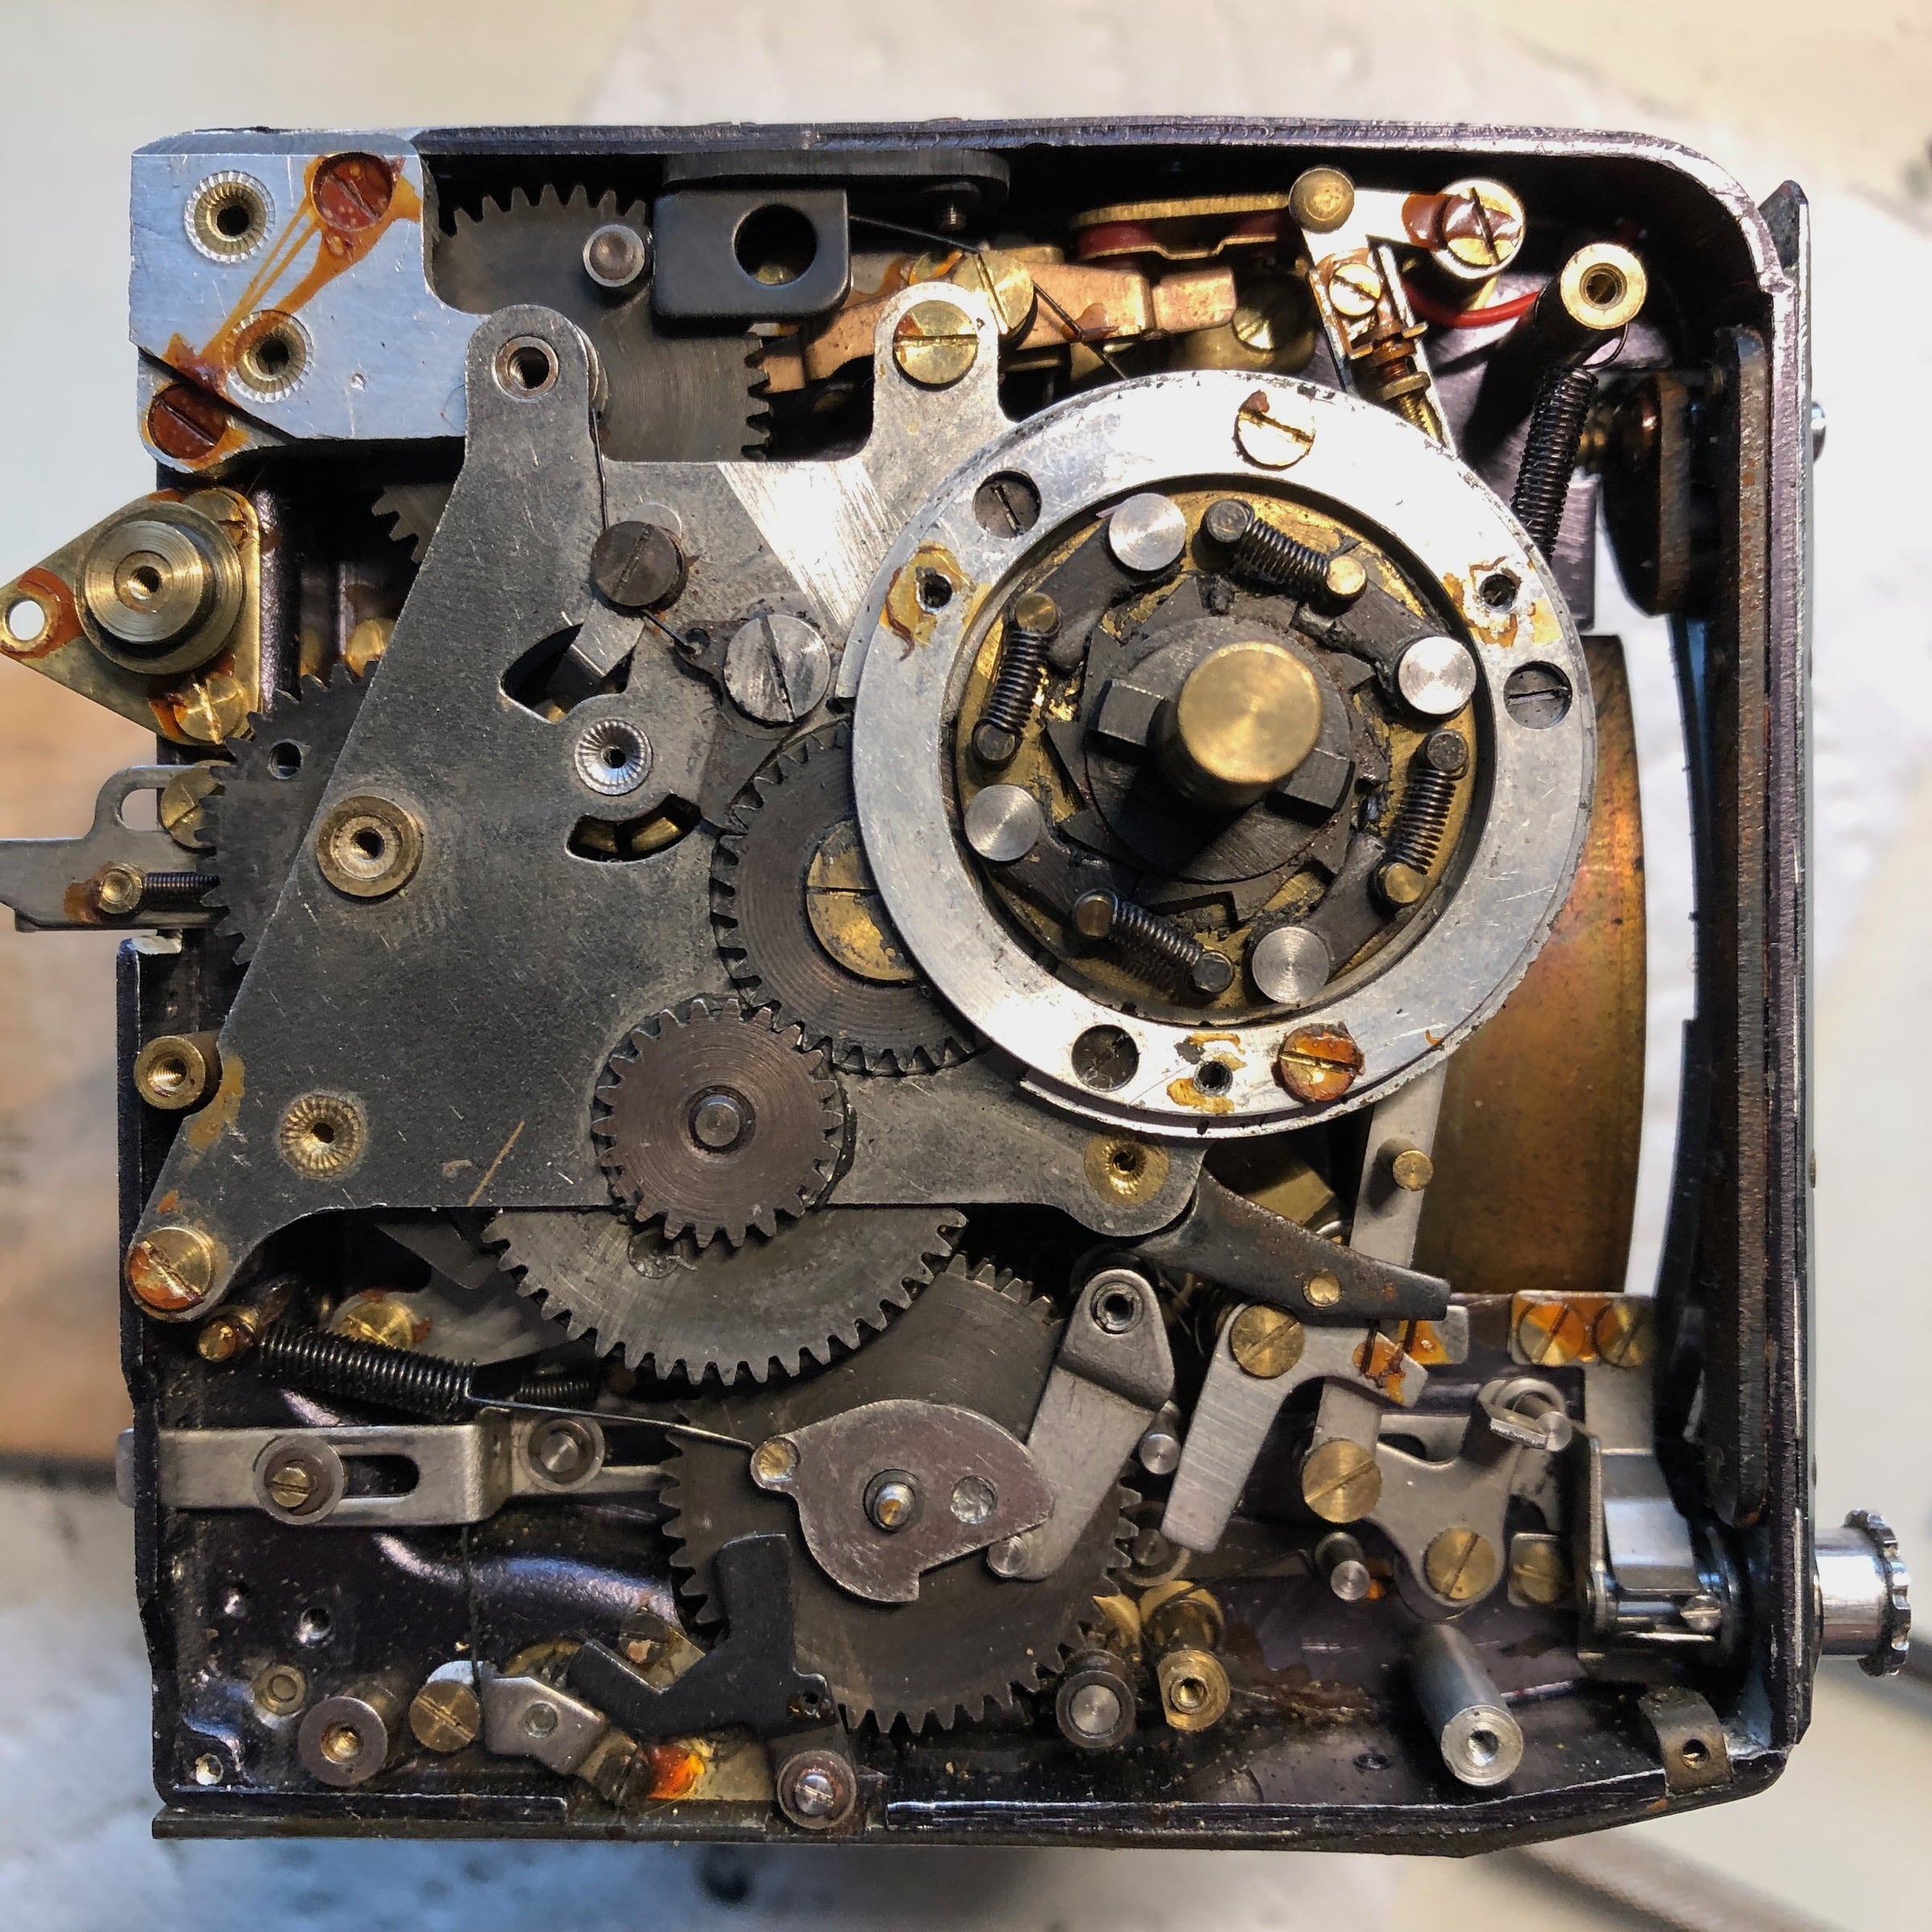
To begin to understand how complicated the internals of the Bronica are, start by considering what happens when the shutter button is depressed. First, the mirror is moved down and out of the way. Simultaneously a curtain covers the opening for the viewfinder and the aperture of the lens is stopped down to the appropriate level. Next, the shutters fire. Finally, the mirror returns to the viewing position, the viewfinder curtain gets wrapped back up, and the aperture is opened back up.
The instant return mirror requires two counter-acting springs which get loaded when the film is advanced. The drivetrain for the mirror is a stack of gears on the wind side of the camera, connected to the shutter release on the shutter side of the camera, which is in turn connected back to the mirror release on the wind side of the camera. The stack of gears for the mirror drivetrain must be assembled in such a way that all gears in the stack are rotated to a certain angle. Getting everything aligned is not hard once you get used to it, but the alignments are not explicitly called out in the manual.
When I received this Bronica C the mirror was stuck in the down position and there was something wrong with the film advance mechanism. It turned out that the mirror was stuck in the down position because the mirror return spring had broken loose from where it should be connected. That fix was relatively easy. The repair of the film advance mechanism was not so easy.
Inside the film winding block there is a pawl which when caught charges all of the springs. Just before the winding block locks at the end of its travel, the pawl is released so that the winding block is not holding tension on the various gear trains. In order for the release to happen without the springs loosing their charge, the pawls in each of the respective gear trains must lock up. The pawl in the winding block has a small spring to ensure it swings back into position, and that spring is held by two brass pins. In my Bronica one of those pins had come loose. And, though I didn’t know this at the time, the loose pin had caused damage to the cog driven by the pawl.
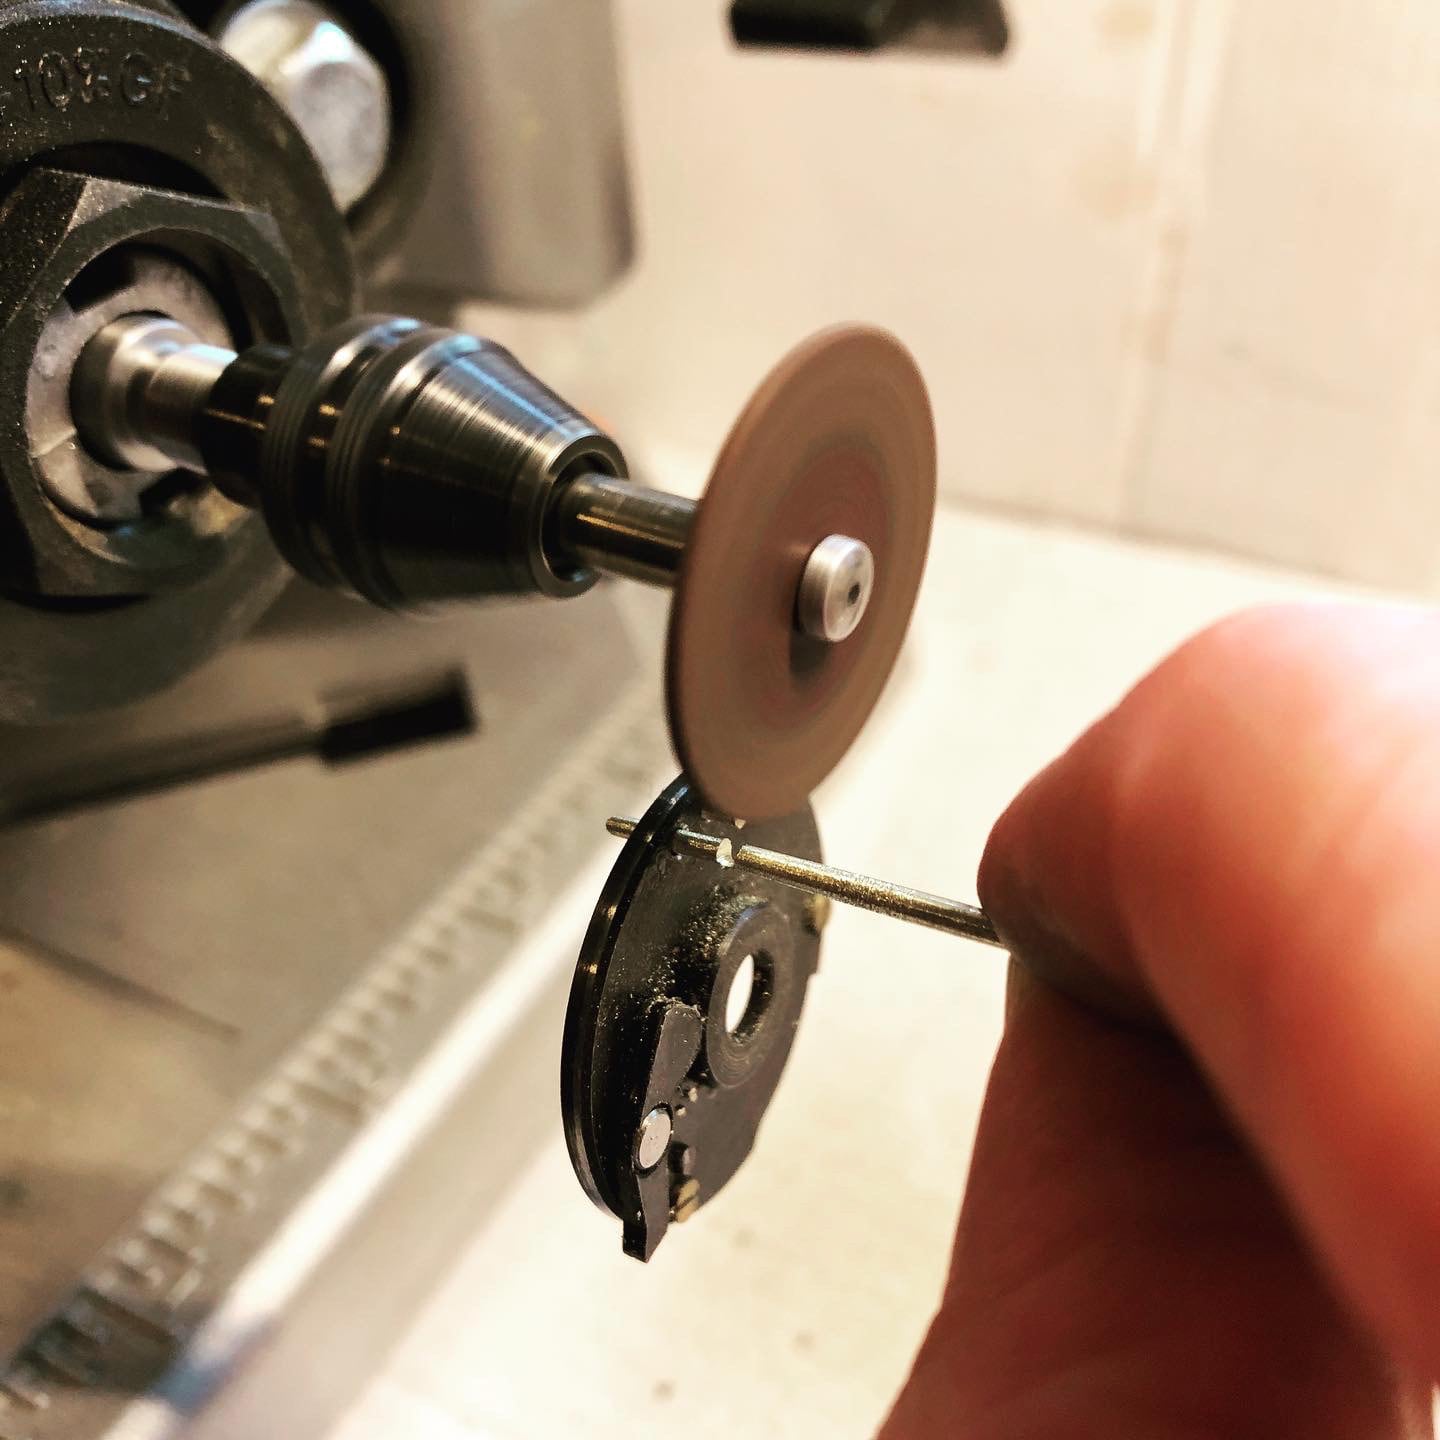
I drilled out the hole for the broken pin, crafted a new pin, and reinstalled it. I reassembled everything, wound the camera, and miraculously it worked. With everything seemingly in order I reassembled the camera and fitted the leather back on. Unfortunately, when I attached the lens to the camera it stopped working again. I though it was because the aperture blades on the lens were oily and stiff, so I cleaned the lens and tried again. This time the film advance got jammed again. So, I had to disassemble the camera once more.
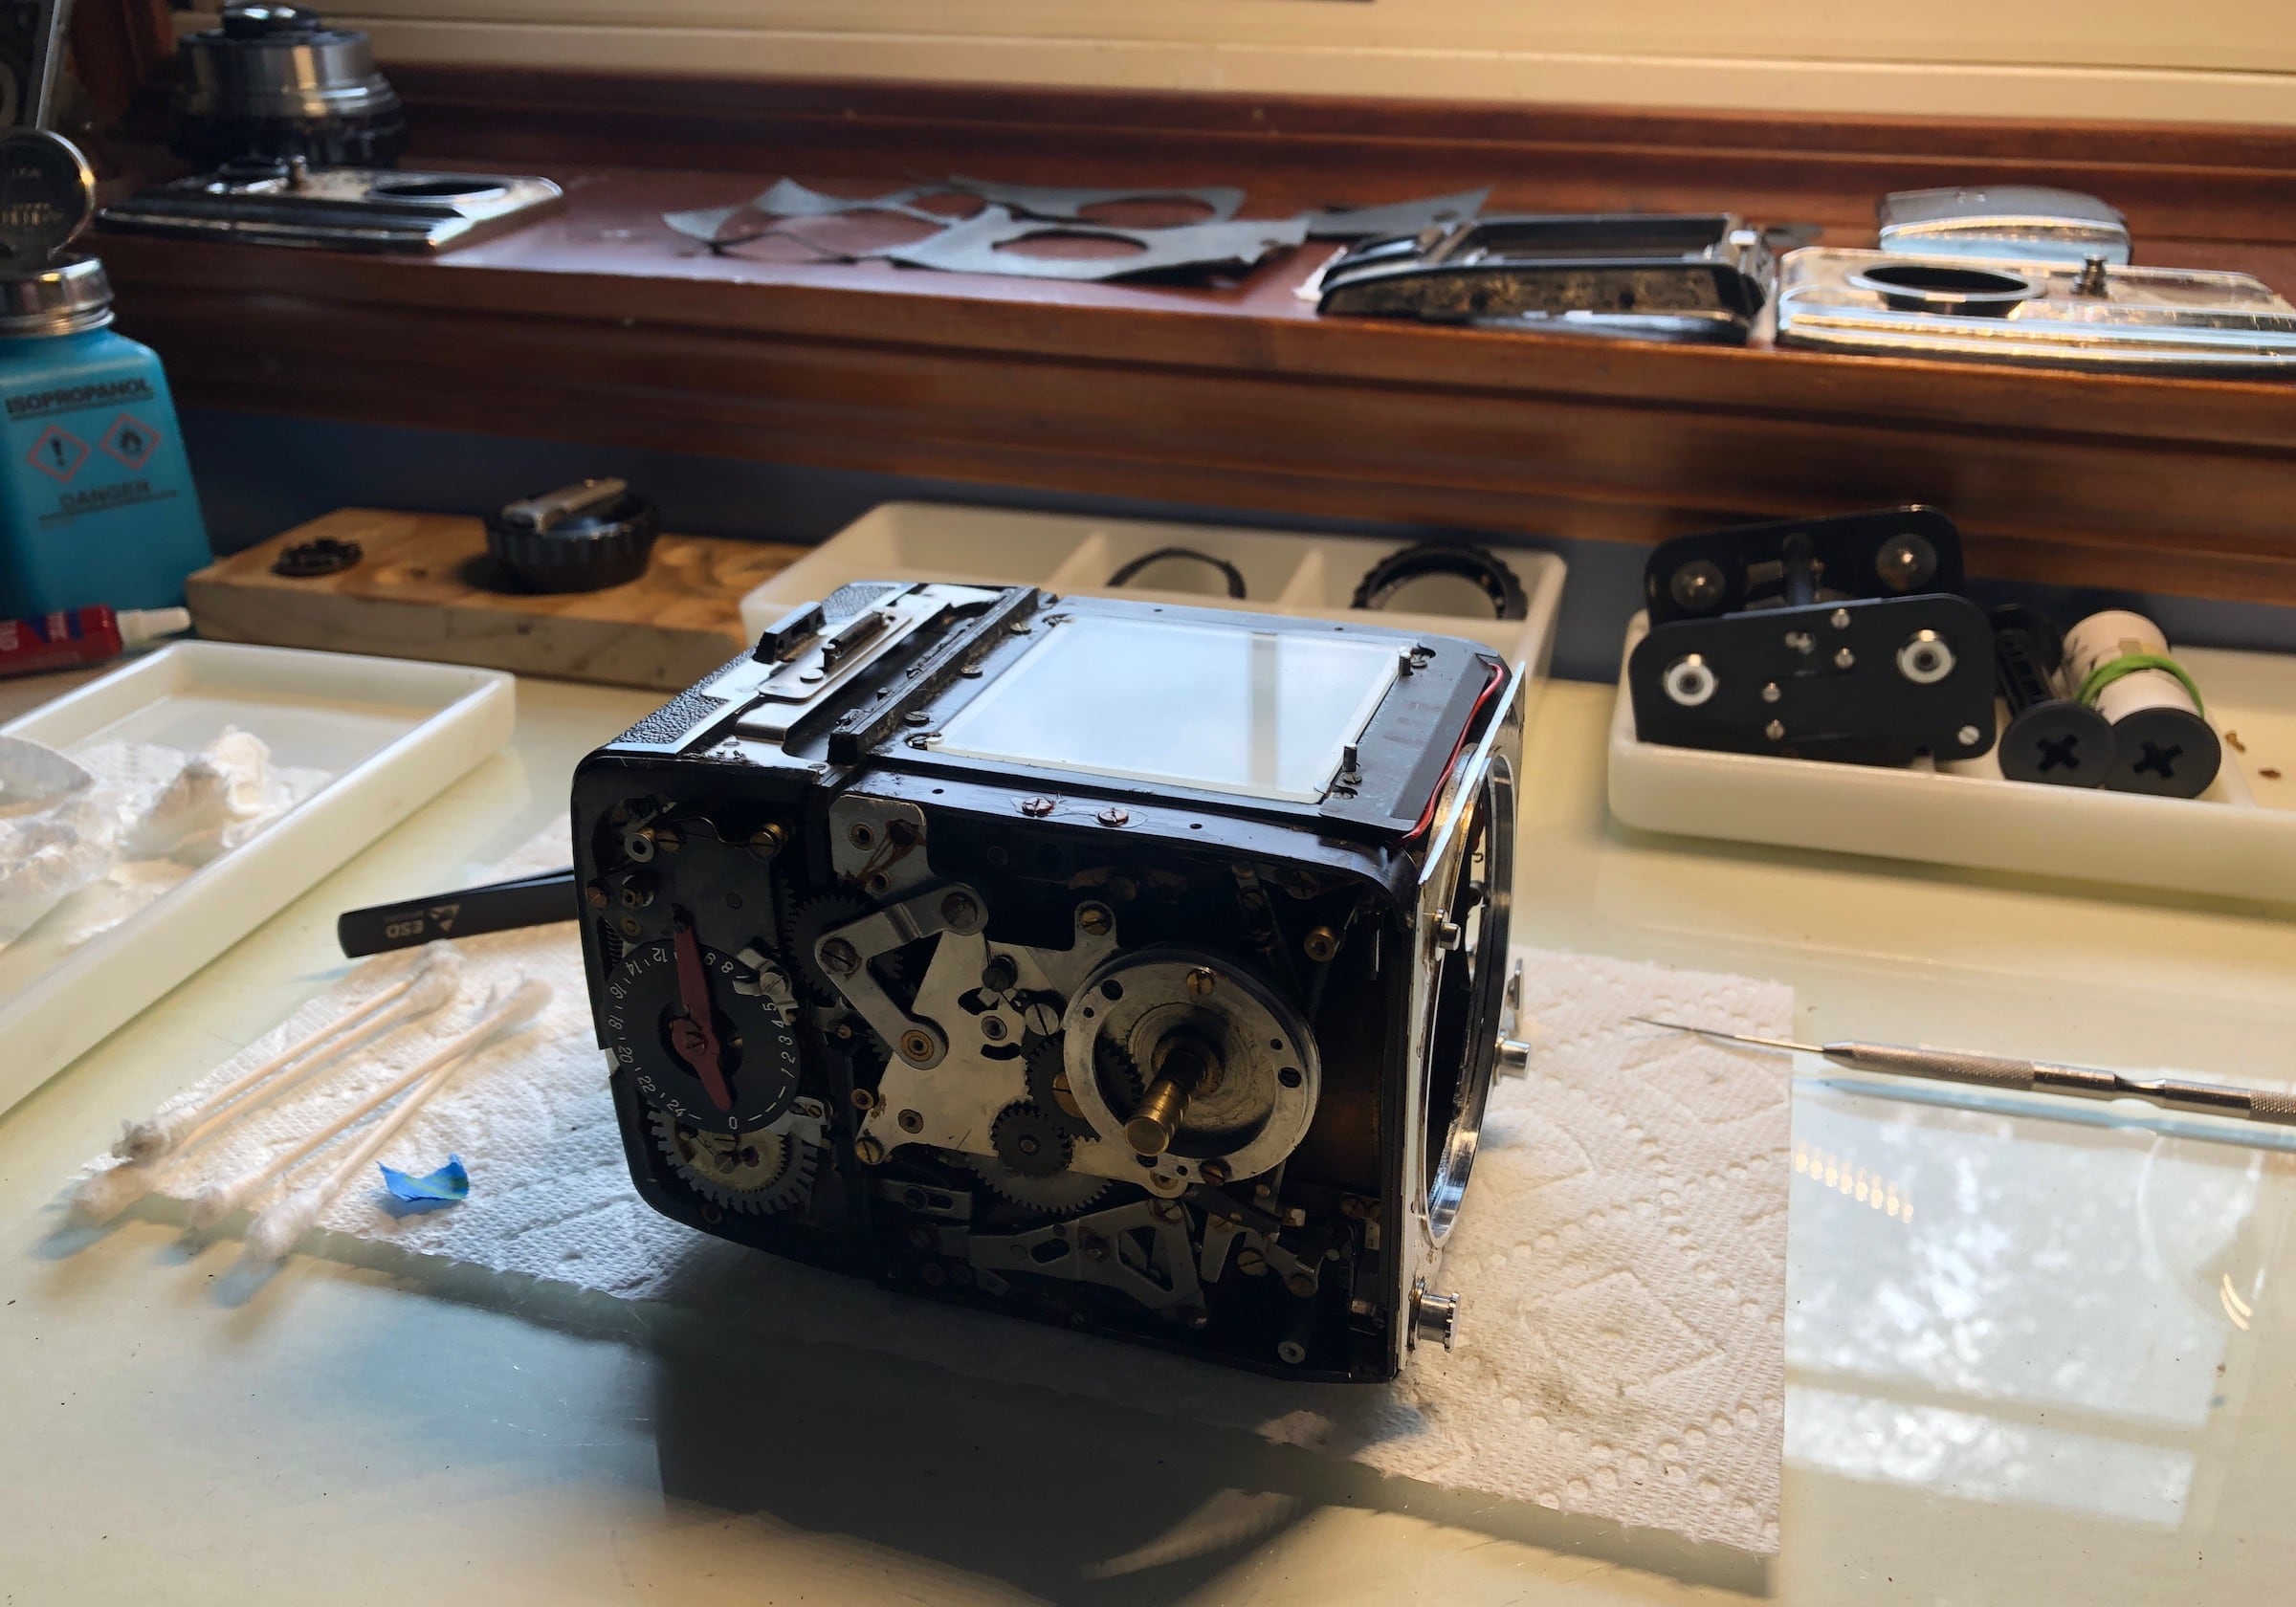
Upon disassembly I found that the damaged cog I mentioned above had completely broken off, and it had bent the brass pins which I had just replaced. So, I had to replace those pins again, as well as fabricate a new pin for the cog. After repairing all of the broken bits in the winding block assembly I needed to determine why the camera would not work when the lens was attached. The camera must have sat with the mirror down for a long time, and that stretched the spring which lowers the mirror. The only way to adjust that spring is to completely take apart the gear stack; the inner gear meshes with the spring gear, so when it is removed the spring tension is released. Through trial and error I determined the correct amount of tension to place on the spring. Once again I reassembled the camera.
With the Bronica once again put back together I found another problem; intermittently it would not charge. Through another disassembly and a lot more trial and error I found that the back of the pawl located within the winding block was catching on things it shouldn’t catch on, causing it to prematurely release tension on the drivetrains. The reason the back of the pawl was sticking out too far was because the other side of the pawl, the side which catches and releases the cog for the drivetrain, was worn down. So, I had to manufacture a shim to prevent the pawl from sticking out too far and triggering when it shouldn’t. A nice side effect of this repair was that the pop at the end of the film winding cycle was also less jarring. Before final reassembly I made a few more minor repairs and ensured that everything was working properly; I tested it a lot.
Through this process of disassembling and reassembling the Bronica C many, many times I, perhaps ironically, came to have more respect for the camera and how it was built. Sure there were things broken on the camera, but I can’t say those things were not broken by rough handling. Additionally, from the looks of the interior of the camera, it had never been serviced. So, some of the Bronica’s purported quirks could be caused by a camera that refuses to quit working even when its internal parts are worn beyond their serviceable lifetime.
BRONICA
“2 Models”
C and S2Uses either the standard 120 film or the new 220 film which allows 24 6x6 frames. With Bronica, the mirror system allows the use of the range of NIKKOR lenses with automatic preselection, from the wide angle 50mm, up to the tele 400mm. Full synchronization, many accessories.
Helical focusing system supporting the new dual mount, for fixing bayonet or screw lenses.