I am going to make a bold claim about this camera. It is the best fixed lens manual focus rangefinder ever built. Even though that statement is highly qualified, I’m sure people familiar with these types of cameras will find it hard to accept. The camera can be had for less than $50, so there’s clearly no huge demand for this camera. What I probably mean, and what most people probably mean when they make assertions about things being the best, is that it’s the best in class for me. Is it the best in class for you? I guess I can’t really say. But, I can lay out my criteria, and if you have similar criteria then you can judge for yourself.
For the Hi-Matic 9 to be the best fixed lens manual focus rangefinder ever made, it first has to be the best in class Minolta ever made. Minolta made some quality cameras, so let’s see if it can even clear that bar. The 9 has a built-in lens-mounted meter, so all the models without a built-in meter are excluded. The sunny 16 rule is great, but I prefer to have instrumentation. I do like to use an external meter for challenging lighting situations, but find it very convenient to have a built in meter for the other 80% of the time. I’m also skipping over all the Minolta rangefinders which had selenium meters, simply because they seem to be less reliable at an advanced age. And, I’m skipping all models with off-lens metering, since metering through the lens [barrel] eliminates an entire class of errors.
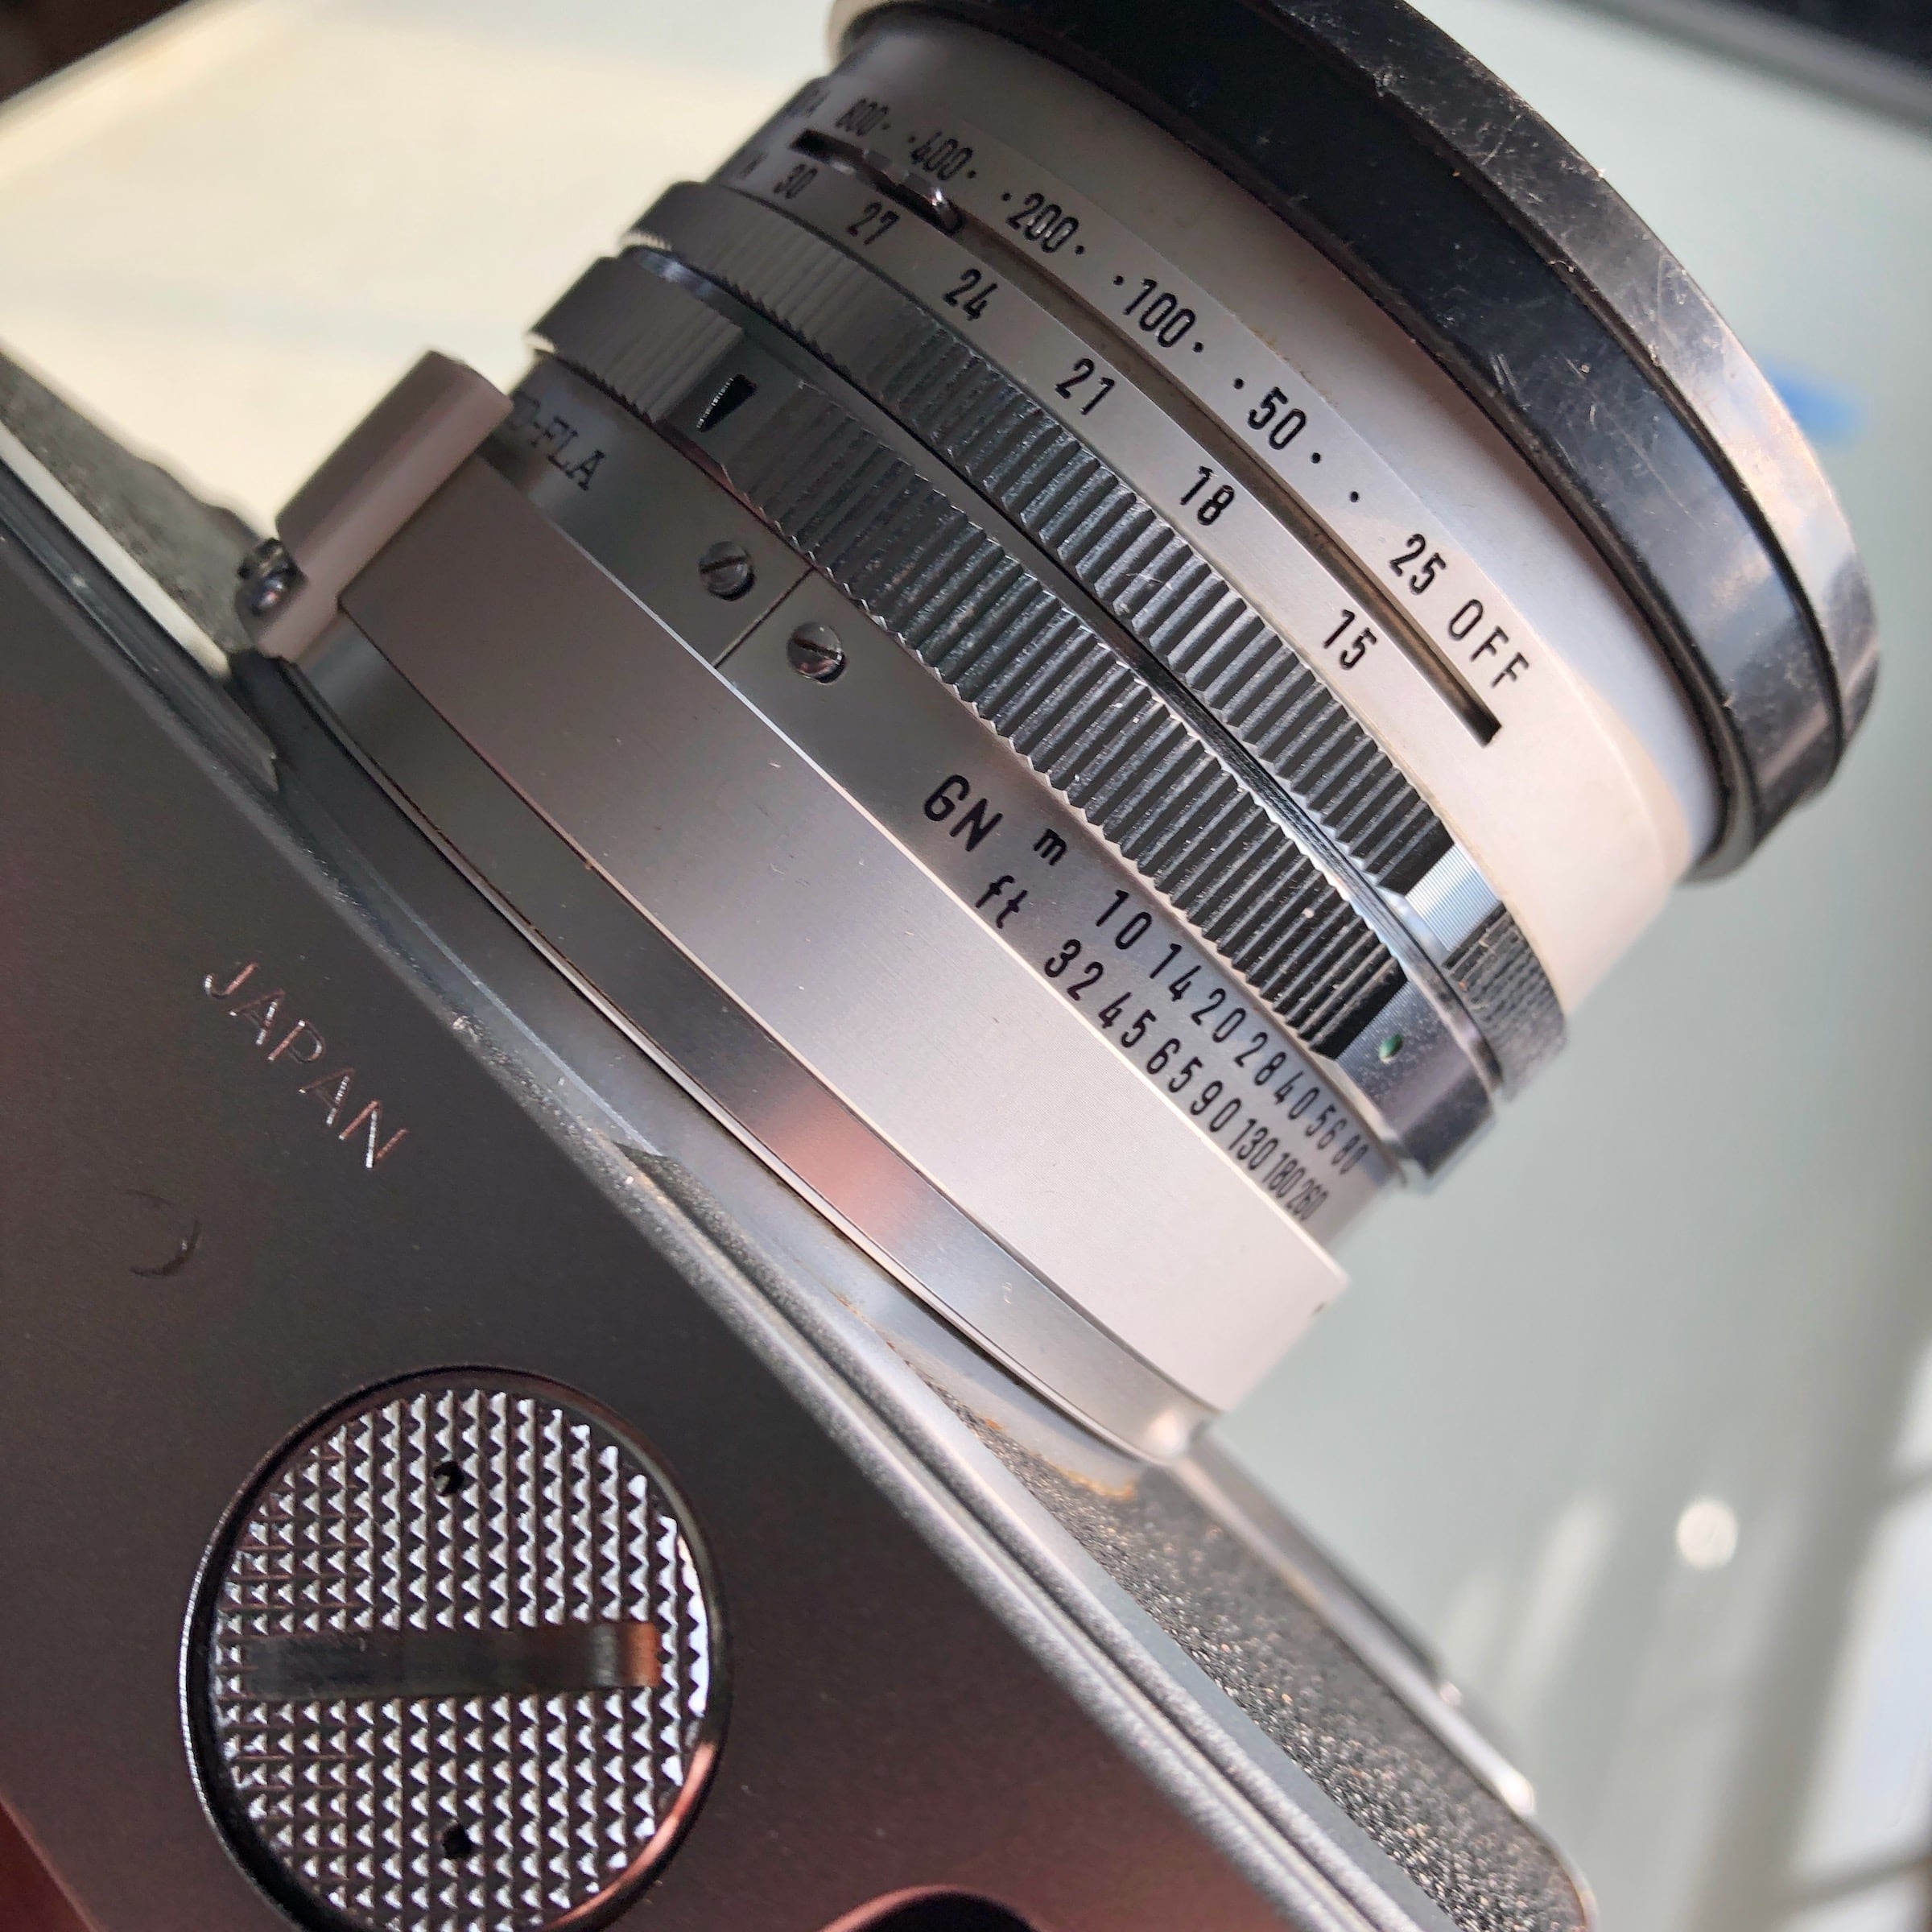
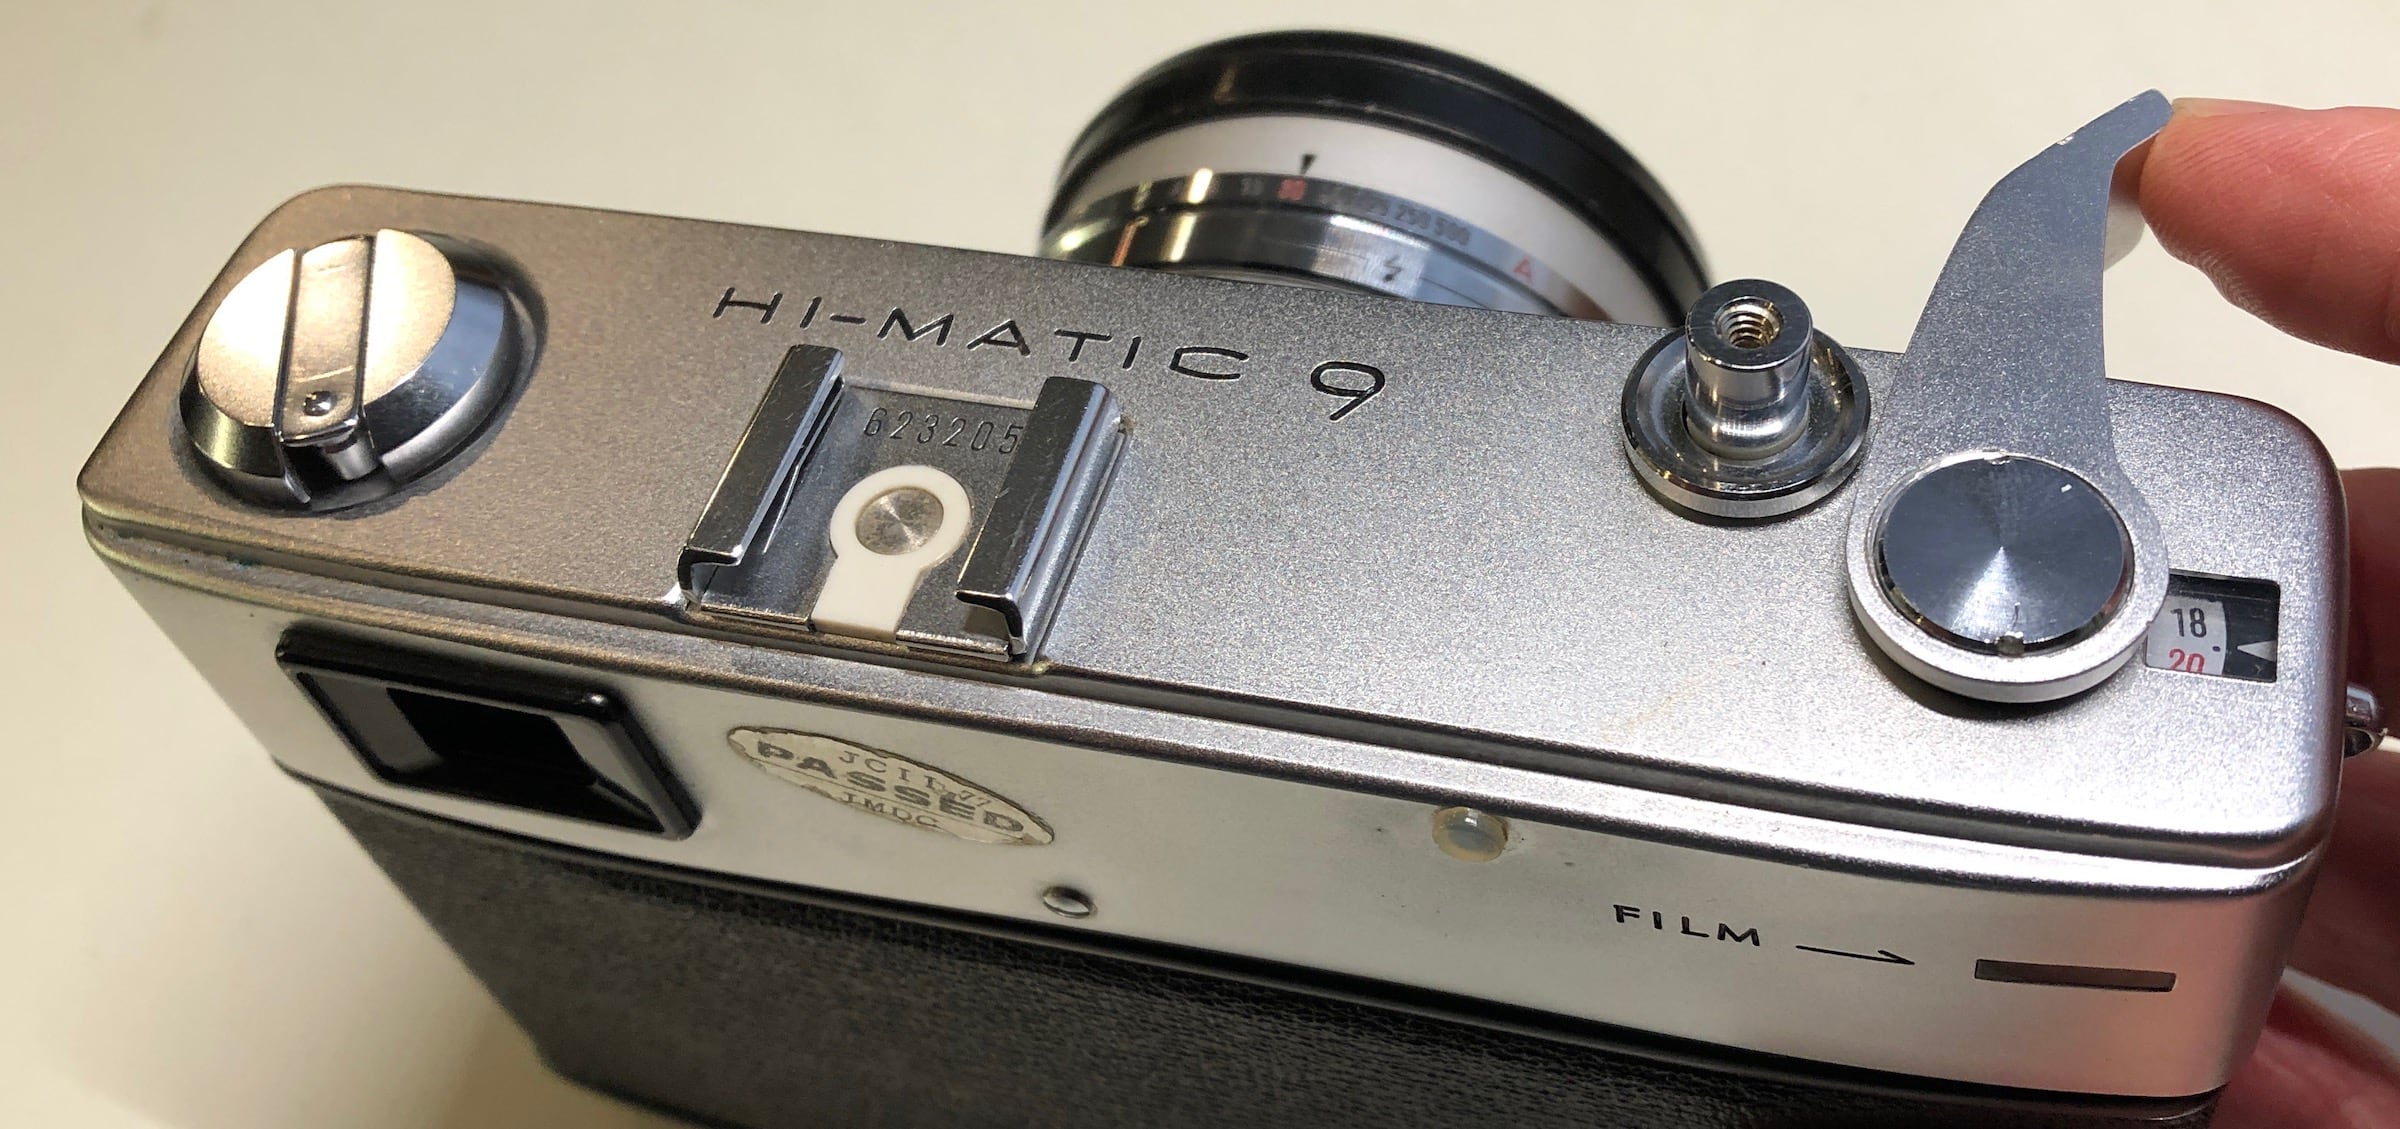
According to Minolta’s advertising the Hi-Matic 9 is better than it’s counterpart the Hi-Matic 7s. The 9 can be set with a flash guide number to automatically adjust the exposure of flash shots, something the 7s cannot do. Also, the Hi-Matic 9’s ƒ/1.7 lens is slightly faster than the ƒ/1.8 in the Hi-Matic 7. If I’m being honest, I don’t think Minolta purposely bumped the speed of this lens though, it is likely just the side-effect of increasing the length of the lens to accommodate the internals required for the flash mode controls. I mean, there seems little reason to change the diaphragm blade configuration for two nearly identical cameras, so perhaps it is simply due to how the actual focal length is rounded to 45. People often list the Hi-Matic 9 as having a minimum aperture of ƒ/22, but the last click stop is at ƒ/16.
Minolta’s numbering scheme for the Hi-Matic line was a bit erratic. The line started with the Hi-Matic, next jumped to the Hi-Matic 7, then Hi-Matic 7s and Hi-Matic 9. They would latter swing back and produce a Hi-Matic 5, but that was actually part of the letter designated series of Hi-Matics. The direct successor to the 9 was the Hi-Matic 11. The feature changes from the 9 to the 11 reflect the beginning of a trend in cameras. Like most technology, cameras became progressively easier to use. From this point forward though, more ease of use often meant a loss of control, at least for consumer grade cameras. The Hi-Matic 11 did not offer the option of fully manual exposure control. The camera was engraved with “Super 3 Circuit,” for its three modes: fully automatic, shutter priority, and flash priority. That’s forty percent less modes than the 9, which had all those mode plus aperture priority and fully manual. This change was probably ushered in by the success of the Yashica Electro 35 and its effective automatic exposure system. I prefer having the option of fully manual control, that’s the draw of these cameras. My smartphone camera does a really good job of capturing photographs completely automatically, if that was the experience I wanted.
The simplified feature set of the Hi-Matic 11 is carried forward in the letter designated series of Hi-Matics. We will skip the Hi-Matic C because it wasn’t a rangefinder and head straight to the Hi-Matic E. From a feature perspective this camera is a smaller version of the Hi-Matic 11, internally the Minolta electronics were replaced with technology from Yashica. The front of the camera has the electro “E” symbol from the Yashica Electro line. The advantage that the Hi-Matic E has over the Hi-Matic 9 is related to shutter speeds, it can go from 1/1000 to 2 seconds whereas the range of the 9 is from 1/500 to 1 second. I am not giving the E full credit for this advantage though. The speeds cannot be accessed manually since there is no manual mode, and due to the electronic design of the shutter it will not fire without a battery. This is unlike the Yashica Electro 35 which will work without a battery, albeit at a fixed shutter speed. This is important because the Yashica Electro technology drains batteries fairly quickly, and replacement batteries can basically only be purchased online.
The Hi-Matic F was just a cheapened version of the E, and the Hi-Matic G was a further cheapening of the F. The Hi-Matic G dropped the Yashica Electro internals and thus went back to a smaller battery, but its lens (38mm ƒ2.8) had more in common with the F (38mm ƒ2.7) than the E (40mm ƒ1.7). Much like Apple’s decision to remove the headphone port from it iPhones, the strive for compactness seems to have been driving camera feature decisions at this time. The camera did have some ways to achieve manual control, but it was no longer a rangefinder. The Hi-Matic G used zone focusing.
Minolta brought back the 40mm ƒ1.7 in 1977 for the Hi-Matic 7s II. From a feature perspective the 7s II was essentially an updated and miniaturized version of the Hi-Matic 11, with a slightly wider lens and without flash priority mode. The 7s II also has exposure lock and manual mode, though without the aid of metering. The balance of compactness and features makes the Hi-Matic 7s II a very popular model; it is the model I would get if I was willing to give up metered manual mode and flash priority for a more compact size. The downside here is that popularity drives price, and the 7s II currently costs on average 4-8 times as much as the Hi-Matic 9. If I wasn’t claiming that the Hi-Matic 9 was the pinnacle of fixed lens Minolta rangefinders, then this camera would be. For fixed lens manual Minolta rangefinders it is all downhill from this point.
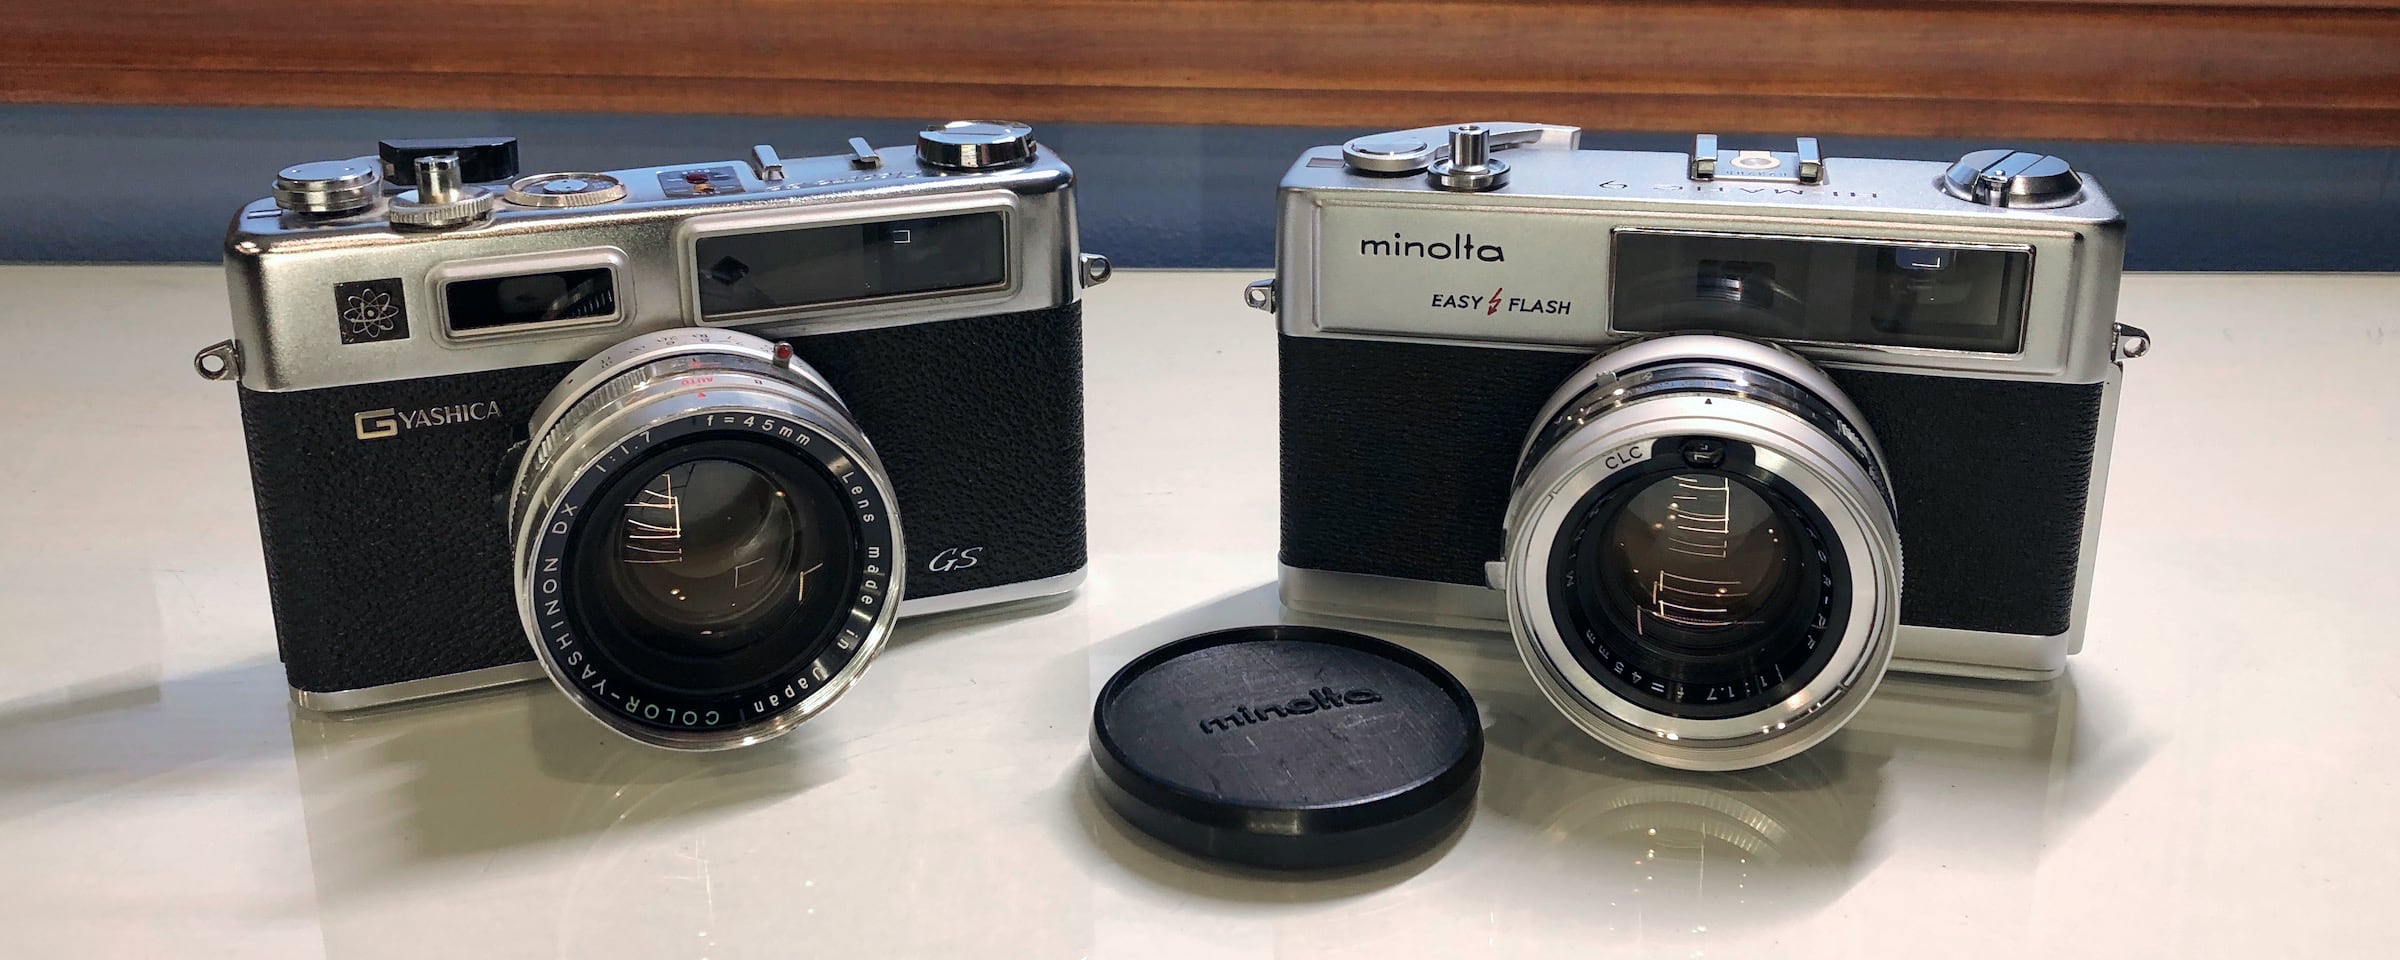
One of the best selling cameras contemporary to the Hi-Matic 9 was the Yashica Electro 35. Yashica must have done something right with the Electro, they sold over 8 million of them from 1966 to 1980. Oddly enough the Electro 35 is the camera that introduced me to the Minolta Hi-Matic line of rangefinders. I purchased my Electro 35 GS as a part of a lot of cameras which also included a Hi-Matic 7s. I didn’t have an A32PX battery for the Electro, so while I was waiting for a battery to arrive I tried some of the other cameras in the lot. I didn’t have a MRB675 battery for the Hi-Matic 7s either, but thanks to its manual mode the Hi-Matic is functional without a battery. In fairness the Yashica technically works without a battery too, but the shutter is locked at 1/500. On a sunny day I could grab some ISO 400 and set the aperture to ƒ16, but Ohio has more cloudy days than sunny, so sticking strictly to sunny-16 is not really practical. Though the Electro 35 has some great low light capabilities the experience I had with batteries biased me towards the Minoltas. Both cameras rely on batteries which can not really be found in stores, so being able to use the camera without batteries could be a pretty big deal.
An argument could be made that the Olympus 35 RC is a superior rangefinder in a much smaller package. The 35 RC does show both the aperture and shutter speed in the viewfinder, it has exposure lock and a flash guide mode, and it prevents the shutter from firing when it would result in an over or under exposed image. On the other hand, the metered shutter lock means the camera will not operate without batteries, and it has a simplified 2 leaf shutter which only fires at six speeds (1/15, 1/30, 1/60, 1/125, 1/250, 1/500). Also, like many 1970s rangefinders, the meter does not work in manual mode. The 45mm ƒ1.7 lens on the Hi-Matic 9 also bests the 40mm ƒ2.8 found on the Olympus 35 RC.
An arguably better shutter priority rangefinder than the Olympus 35 RC is the Canon Canonet GIII QL17. The Canonet has a wider shutter speed range of 1/4 to 1/500, but that is still less than the Hi-Matic 9. The Canon also has the eponymous quick loading system, which is nice though not entirely necessary. Like the Yashica Electro, and unlike the Hi-Matic 9, the GIII QL17 needs good seals to avoid light leaks – all cameras need to be sealed from light of course, the Hi-Matic 9 relies more on deep interlocking channels than foam. The controls for the GIII QL17 are all around lans barrel, like the Hi-Matic 9. Unlike the the Hi-Matic 9 they feel cramped. This cramped feeling due to the smaller size of the Canonet.
The GIII QL17 is a great camera, which is surely why Canon sold over 1.2 million between 1972 and 1982. To me though it is more comparable to the Minolta Hi-Matic 7s II. And, as I said for the 7s II, if you are willing to give up a little functionality to get a more compact camera, then the Canonet would be a better camera for you. Well, unless you prefer to shoot aperture priority, then the Hi-Matic 7s II would be the one.
The change in cameras from the 1960s to the 1970s in some ways echos what happened to automobiles over that time. The large sturdy framed muscle cars of the 1960s eventually gave way to the small econoboxes of the 1970s. If I was in to classic cars I’d probably prefer the 1966 Ford Mustang to a mid-70s Mustang II, and maybe that explains my fondness for the Minolta Hi-Matic 9 over the various compact rangefinders of the 1970s.
Having said all of those nice things about the Hi-Matic 9, there are definitely some downsides. First, it is a relatively large and heavy camera. Though it can be squeezed it into large coat pockets, it’s not really pocketable or discrete. That means it has to be brought along intentionally, it’s not a camera that someone would just leave in their coat pocket or bag so they have it on hand when they want it. The small irony is that when these cameras were produced they were the lightweight choice, at least when it came to 35mm cameras. If size or portability were a top concern, then this wouldn’t be the best rangefinder; the Minolta 7s II, Canon Canonet GIII QL17, or Olympus 35RC would be much better choices.
The camera also has some quirks. The film advance lever requires a very long swing. It has to be cranked all the way around to the front! I believe it requires 220 degrees of swing to advance to the next frame. Multiple smaller cranks work too, but it is still a long way to go between frames. Also, the shutter release has a sound that is more akin to the “clunk” of machine gun being uncocked than the smooth soft “shick” of a Prontor shutter. Maybe that’s just the unavoidable side-effect of the hardware required to move blades quickly and reliably across such a large opening.
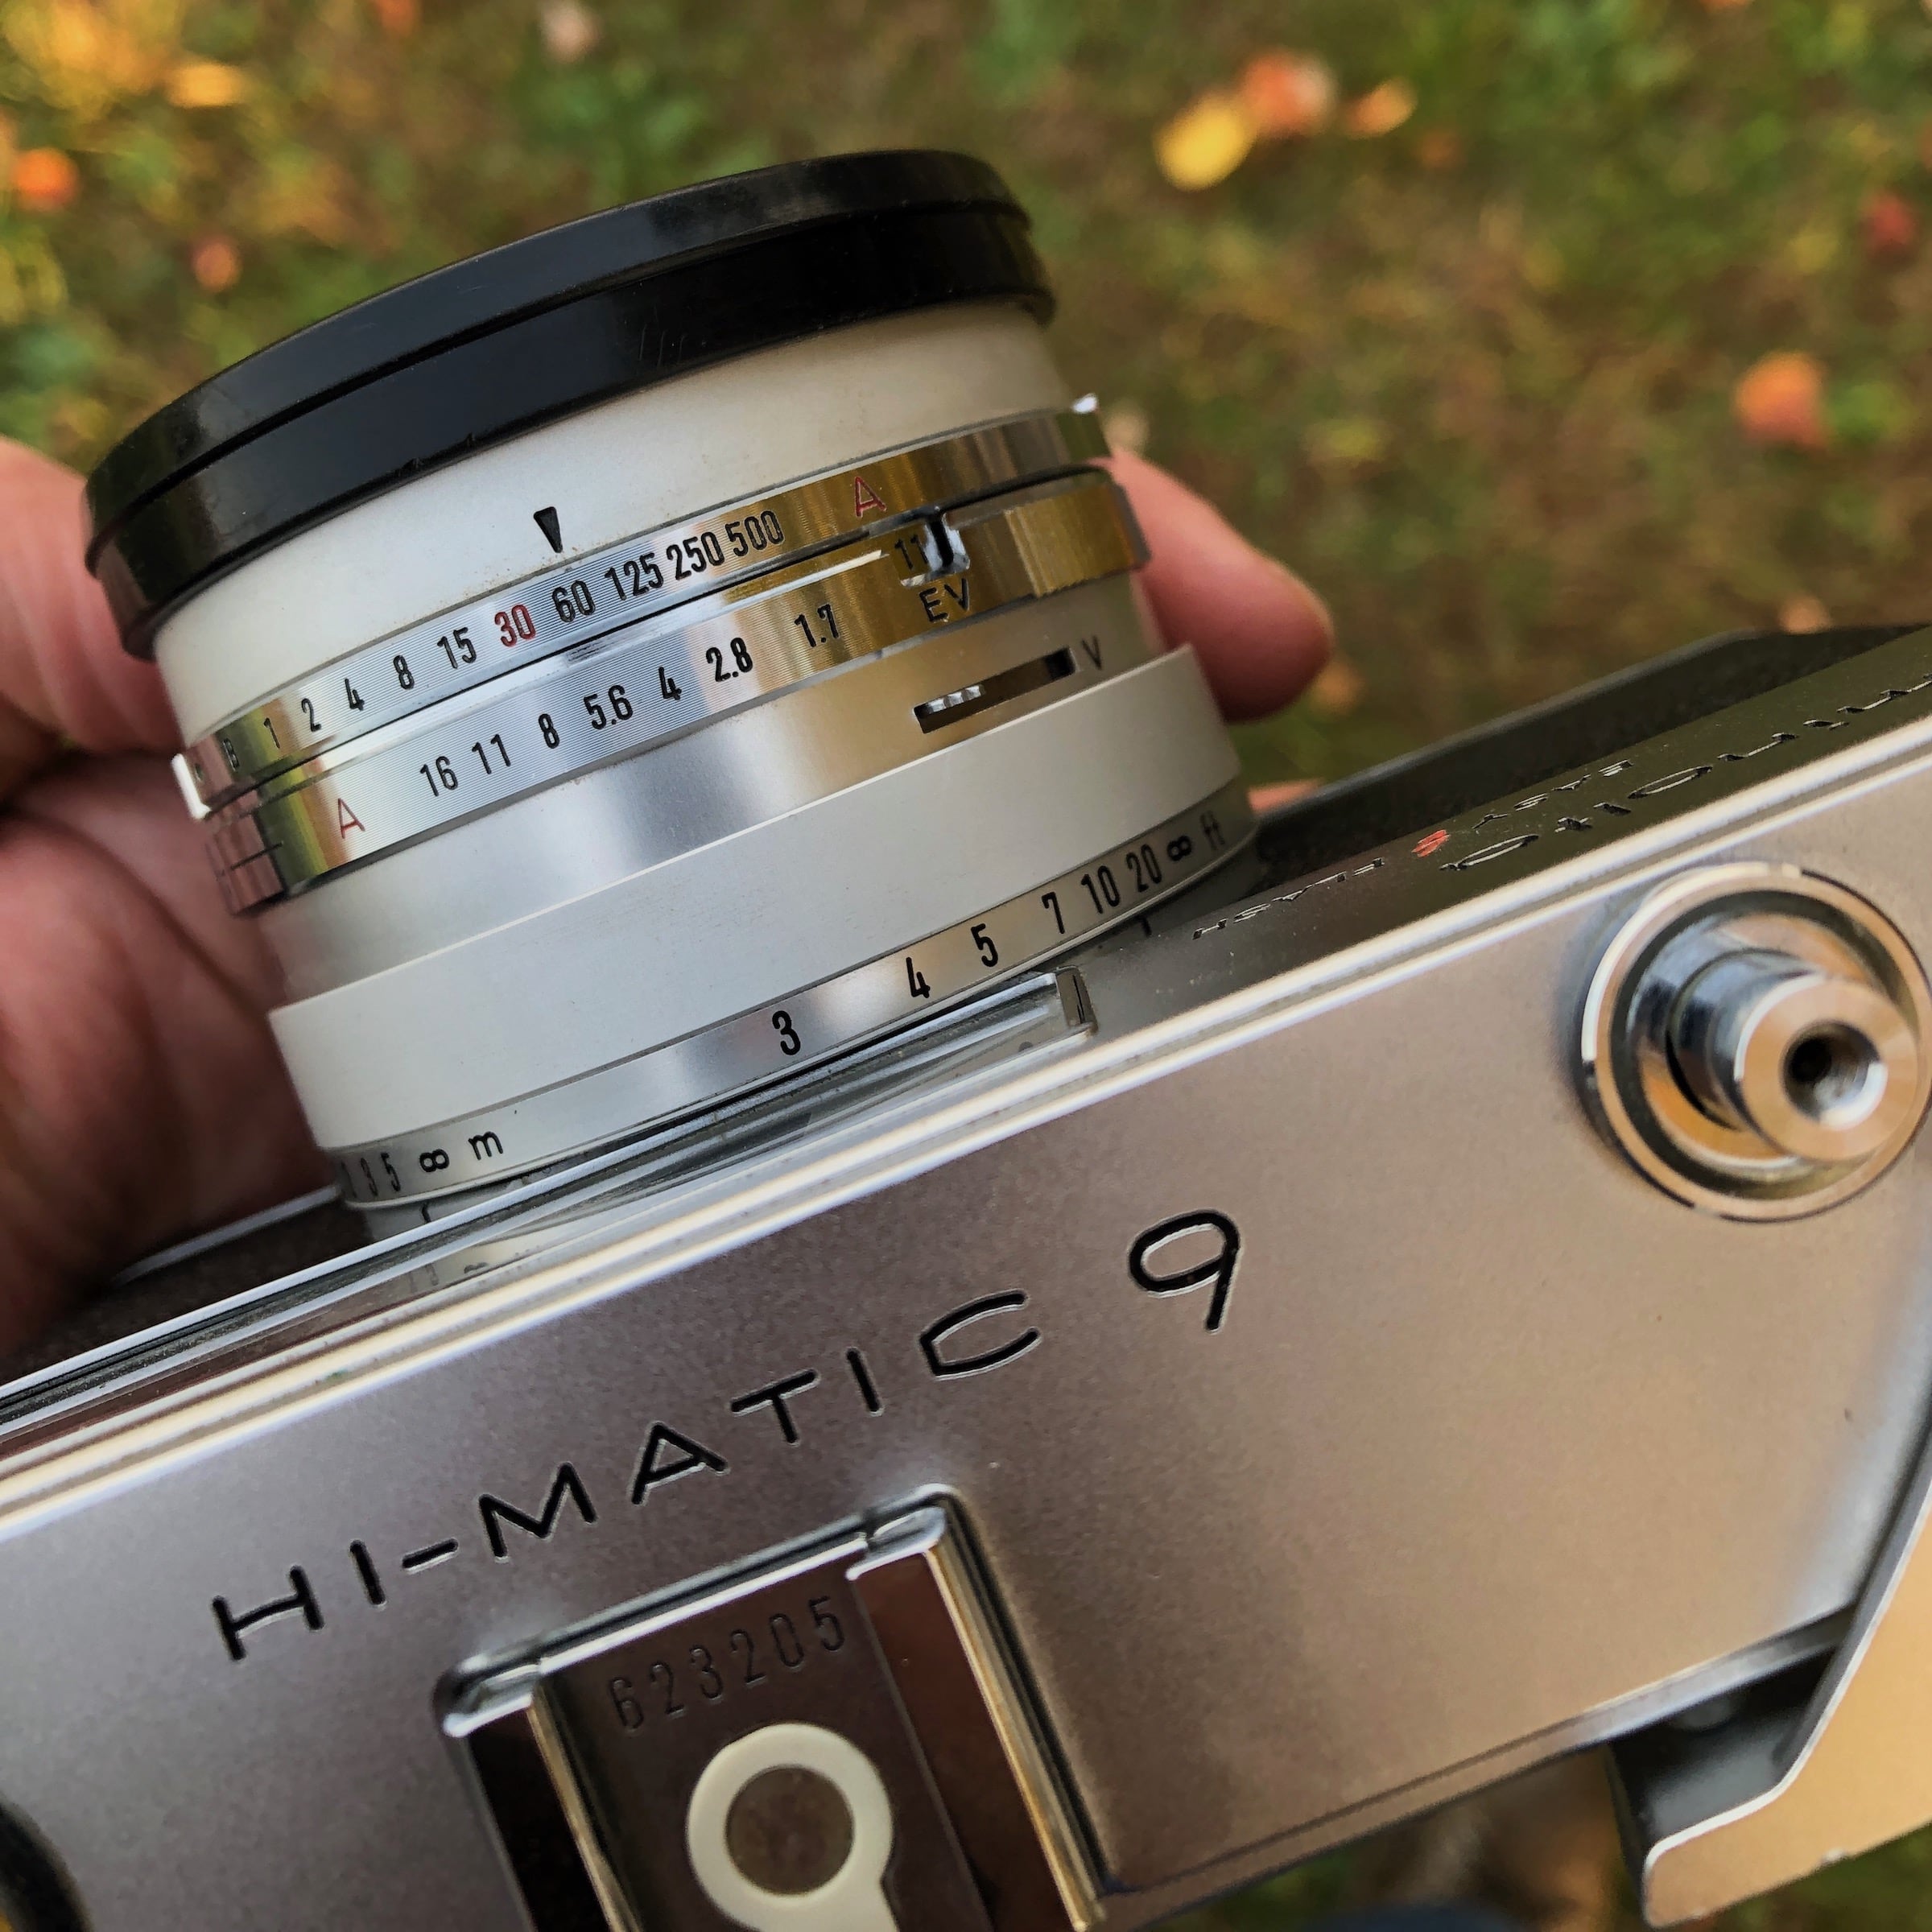
And, it can be difficult to change the shutter speed independently of the aperture. Shooting the camera in automatic mode simply requires rotating the shutter and aperture controls into the A position. Once in auto the controls are locked to prevent them from accidentally getting rotated out of auto. In shutter, aperture, or flash priority the opposite ring is locked into position A. In manual mode both rings can be moved, but the shutter ring is smaller, so it can be difficult to rotate it independently of the aperture ring. Moving both control rings together is a nice feature when the correct exposure value is selected and you simply wish to change settings without changing exposure, but that is probably not the main use case. It’s almost as if the camera wants to be used in aperture priority.
That leads me to my final complaint. Though I have touted the strength of the Hi-Matic 9’s exposure control system and its manual capabilities, it does enforce a certain process. The viewfinder only has a meter, there is no matching needle or over/under exposure warnings which would allow for changing settings without pulling the finder away from your eye. So, the camera must be brought up to eye to check the meter, pulled away from the eye to set the exposure, then brought back up to frame the scene. Finally, the recessed EV scale on the lens barrel that gets matched to the meter is hard to see in low light, and even harder to see when the reflection of a flashlight is bouncing off of the chrome.
Despite the quirks and shortcomings, I just enjoy using the Hi-Matic 9. This camera has dropped to my number two slot, but only because I ended up getting a newer Minolta which is more portable and more versatile. I skipped over the 7s II though and went straight to the absolute best Minolta rangefinder ever made, the Minolta CLE. I still grab the Hi-Matic 9 first when I want a more rugged camera, or if I’m going to be pointing the camera directly at the sun, or when I explicitly want manual mode. I also take the Hi-Matic 9 along for anyone I bring shooting with me.
this would be the world’s only camera with 3-way exposure control
if it weren’t for these
Only three cameras let you take pictures automatically, semi-automatically and manually. They’re all made by Minolta. On automatic, you just point, focus and shoot. A great Rokkor lens and sensitive electric eye automatically give you perfectly exposed, exquisitely sharp prints. If you’re a bit of a do-it-yourselfer, use the semi-automatic setting. A needle in the viewfinder tells you how to set the lens after you’ve picked a shutter speed. And when deep in your heart you think you’re a pro (and maybe you are), you can set any of these three cameras manually.
Hi-matic 9: Besides 3-way operation, this advanced “35” will automatically set correct lens openings for flash shots once you set the flash guide number on the lens barrel. Rokkor f/1.7 lens, speeds from 1 to 1/500th. Under $110, plus case.
Hi-matic 7s: Almost identical to above, except that you figure flash apertures. Rokkor f/1.8 lens; shutter speeds from 1/4 to 1/500th. Under $95, plus case.
Autopak 700: Combines 3-way exposure control with instant 126 cartridge loading. Easily the most versatile instant-loader you can buy. Under $70, plus case.
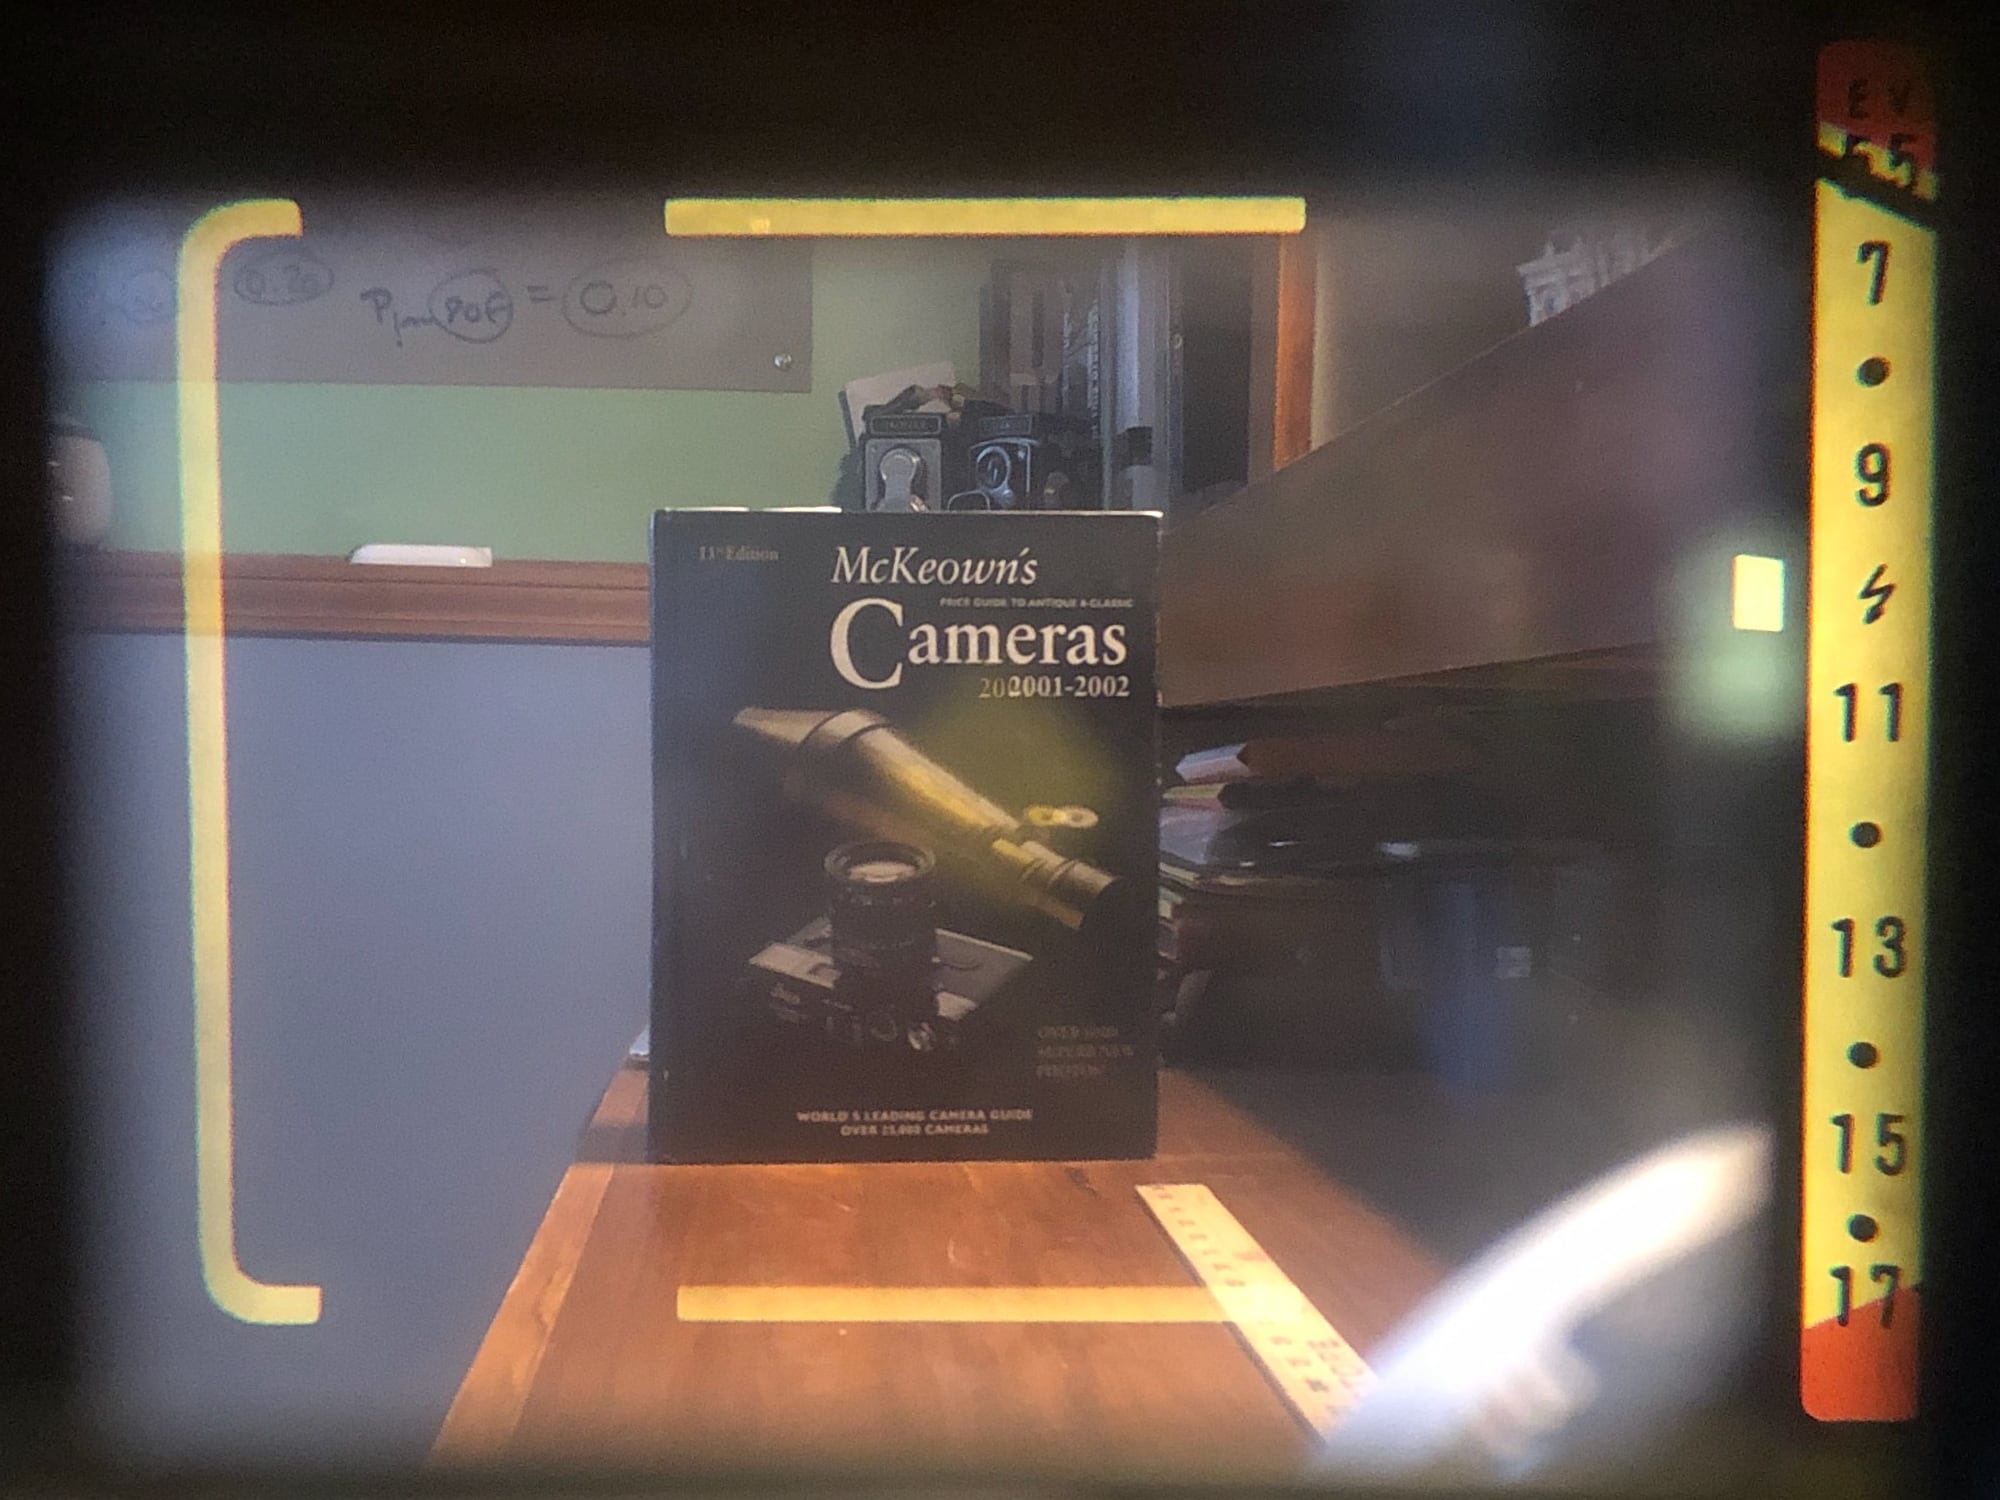
When clean, the parallax corrected frame lines and in-viewfinder meter are very bright. The camera also has a battery check function visible in the viewfinder. When the camera is set to battery check and the batter is good, the exposure meter drops into the yellow box next to the lightning (⚡️) symbol that is between 9 and 11 on the exposure value scale.